Finally I’m doing something arguably slightly musical with my SP0256A-AL2! Playing it over MIDI.
- Part 1 – Basic introduction and getting started
- Part 2 – Arduino programmable clock
- Part 3 – Using a Raspberry Pi Pico as a programmable clock
- Part 4 – Using a HC4046 PLL as the clock
- Part 5 – Using an I2C SI5351 programmable clock
- Part 6 – Adding MIDI
Warning! I strongly recommend using old or second hand equipment for your experiments. I am not responsible for any damage to expensive instruments!
If you are new to microcontrollers, see the Getting Started pages.
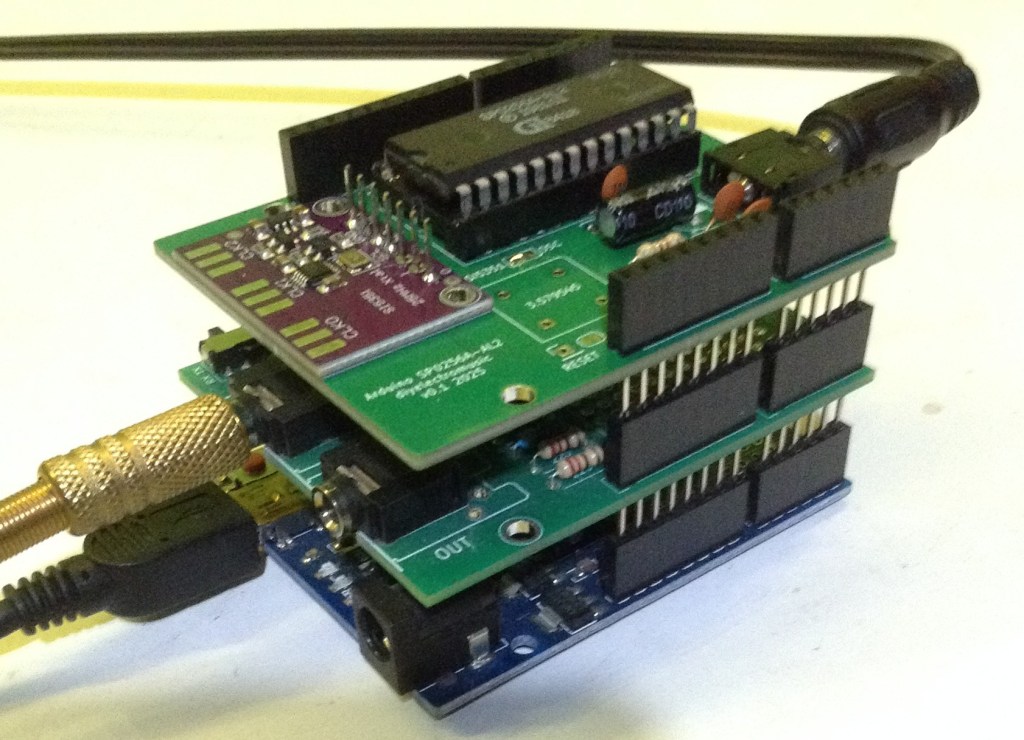
The Circuit
This is using my Arduino SP0256A-AL2 Shield with an SI5351 programmable clock module, so this is essentially the circuit from Arduino and SP0256A-AL2 – Part 5 with the addition of a MIDI module.
I also used my Arduino MIDI Proto Shield but any MIDI RX circuit on the Arduino RX pin would work.
The same circuit can be made on solderless breadboard, but I’ve opted to use my PCBs for convenience as that is why I designed them in the first place.
The Code
I’m using all the main code from Arduino and SP0256A-AL2 – Part 5 but I’ve split the speaking into “start” and “stop” parts so I can drive them from MIDI NoteOn and NoteOff messages.
The main “speak” code now looks like the following:
void speak (uint8_t note) {
  if (note == 0) {
    spAllo(PA3);      // Speaking off
    return;
  }

  if ((note < MIDI_NOTE_START) || (note > MIDI_NOTE_END)) {
    return;
  }

  midi2clock (note);
  switch(note){
    case 36:  // Do
    case 37:
    case 48:
    case 49:
      spAllo(DD1);
      spAllo(OW1);
      break;

    case 38:  // Re
    case 39:
    case 50:
    case 51:
      spAllo(RR1);
      spAllo(EY1);
      break;

...
So when called with note==0 it will stop the speaking by sending PA3, but for any note between 36 and 56 it will set the frequency and then say the appropriate “Do, Re, Mi” word. I’ve used the same word for the natural and sharp equivalent. I’ve also allowed for two octaves. This is why there are four note values that result in the word “Do” being said: MIDI notes 36, 37 (C2 and C#2), 48, and 49 (C3 and C#3).
This can now be called from the code that handles MIDI Note On and Note Off messages.
Closing Thoughts
It works, but it isn’t very responsive due to the time it takes to say each allophone.
I guess when I started thinking about doing this, I thought I’d get more of a frequency range from the device and wasn’t anticipating it being so “low” in the musical range either.
But it is quite fun to see it finally being driven by a music keyboard, even if it isn’t particularly practical!
I know there is emulation of an SP0256A-AL2 in the RC2040 (an emulation of the RC2014 on a Raspberry Pi Pico) so I might at some point look at seeing if I can just drop the hardware and doing it all in software at some point by adjusting sample and playback rates.
I suspect that will work a lot better, but it isn’t quite the same as driving the real thing 🙂
Kevin

Nice! I agree that using the vintage chip is more meaningful than emulating it. Maybe there’s a way to improve the responsiveness.
LikeLike
There are some delays recommended for the allophones that I’ve included. I don’t know if that is to wait to allow them to complete or a length required to make them sound better, so I might be able to do some messing around with those and see if it makes a difference. Finding a way to allow the next one to cut-in would help responsiveness at the expense of what little clarity there is!
But fundamentally it is playing samples at a rate linked to the external frequency, so I think my options will be limited!
Kevin
LikeLike