By way of completing this initial look at multiplexing potentiometers, this is how I used a Sparkfun 16 port multiplexer in my Arduino MIDI Step Sequencer.
Warning! I strongly recommend using an old or second hand keyboard for your MIDI experiments. I am not responsible for any damage to expensive instruments!
These are the key Arduino tutorials for the main concepts used in this project:
- Arduino Analog Input
- Arduino MIDI Library
- The 74HC4051 Multiplexer tutorial on the Gammon Forum
- Sparkfun Multiplexer Hookup Guide (for the HC4051 breakout, but the principles are the same here)
If you are new to Arduino, see the Getting Started pages.
Parts list
- Arduino Uno
- 16x 10k potentiometers
- 1x 75HC4067(or similar) 16 port multiplexer chip or breakout module
- MIDI out module (for examples, see Arduino MIDI Interfaces)
- Breadboard and jumper wires
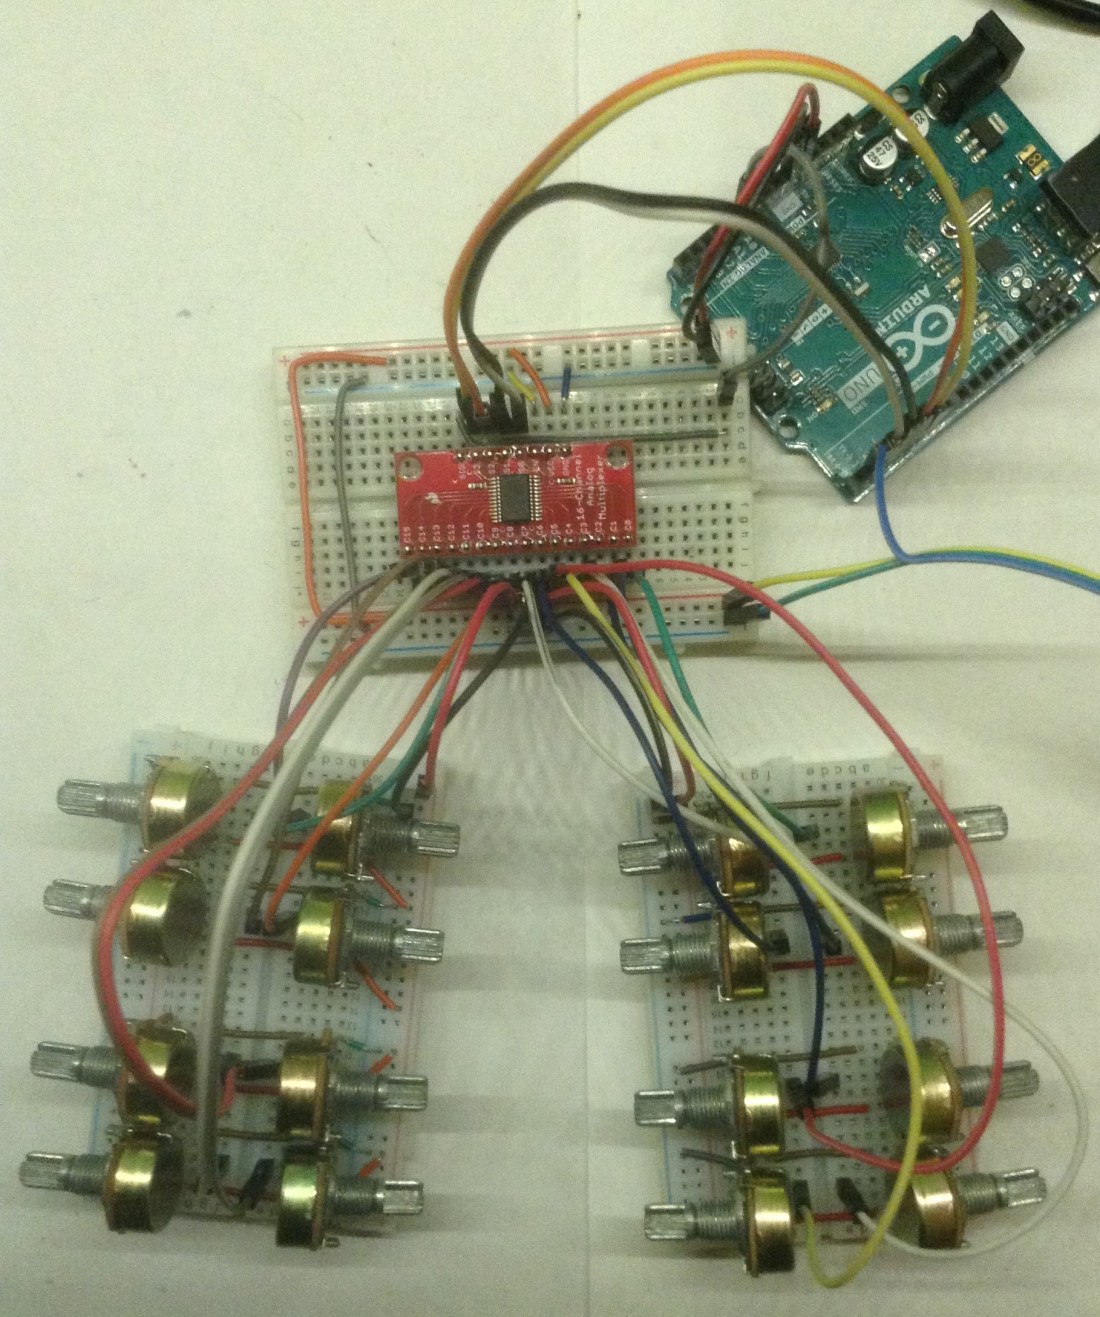
The Circuit

In this project I’m using the Sparkfun 16-port multiplexers breakout board based on the CD74HC4067 which makes it very easy to use. You can see how this hooks up to the Arduino in the diagram above. I’ve only shown one potentiometer for simplicity (and links to hook up to two more). You can continue to connect potentiometers up to all 16 inputs in a similar manner.
As this is a 16-port multiplexer there are now four control lines required to choose which of the input sources you wish to be connected at any one time. There is also an (active low) enable pin on the breakout board, but I’ve left it enabled all the time by linking this directly to GND.
The only remaining connection is the output of the multiplexer which needs connecting to one of the Arduino analog input pins – I’m simply using A0.
For a great tutorial on the use of multiplexers as MIDI control devices, see this Notes and Volts video.
Advanced Bit
I’ve had a “potentiometer shield” from KLONECOM for some time – I originally stumbled across it on an online auction site and haven’t really found much information about it anywhere else, although all design files are available on github. Searching more recently once again still doesn’t really turn up much about it so this is really a “note to self” part of the post.

It is pretty much exactly the above circuit on a large shield with sixteen pots arranged in a 4×4 grid. An Arduino Uno and a cheap HC4067 breakout plug into the underside of the shield and then we’re good to go!


There are two quirks:
- The HC4067 breakout must be soldered “pins up” to plug into the shield.
- There is no way to breakout the RX/TX from the Arduino for a MIDI connection.
I used one of my Arduino clones with additional RX/TX pins on the board to link to one of my Arduino MIDI Interfaces.

The Code
This uses exactly the same code as for the Arduino MIDI Mux Step Sequencer but with configuration changes to allow for 16 inputs – NUM_POTS is set to 16 and MUX_S5 is uncommented.
#define NUM_POTS 16 // Up to 8 or up to 16 depending on which multiplexer is in use
#define MIN_POT_READING 4 // Value for the lowest note
#define MUX_POT A0 // Pin to read the MUX value
#define MUX_S0 2 // Digital IO pins to control the MUX
#define MUX_S1 3
#define MUX_S2 4
#define MUX_S3 5 // HC4067 (16 ports) only, comment out if using a HC4051 (8 ports).
As this is now playing through 16 notes instead of 8 you might want to up the tempo a little too. To do this, change the delay() value at the end of the loop() function:
// Move on to the next note after a short delay.
// 250 = 1/4 of a second so this is same as 240 beats per minute.
delay(250);
playingNote++;
Change it to 125 – i.e. half the delay – to double the tempo to 480 “beats” per minute – although I really think about it as 120 bpm but now with four subdivisions a beat instead of the previous two.
To use the same code with the KLONECOM shield, there is just one change required – the shield uses A5 by default. Coincidentally it uses digital pins 2-5 in the same order as the above circuit, so no further changes are required There is some provided Arduino code that encapsulates MIDI controller functionality into the KLONECOM code directly. It is apparently based on code from notesandvolts.com, (which you can explore in detail in their tutorial here), but for now I’m keeping it simple.
Find my code on GitHub here (configured by default for the 8-port multiplexer and A0).
Closing Thoughts
Now that I have 16 configurable inputs things can start to get interesting and with the now very convenient form factor of the KLONECOM board it is a lot more reliable than all those jumper wires.
Kevin

hello kevin fantastic to see your experiments with the klonecom midiklone pcb 🙂
klonecom
LikeLiked by 1 person