This is another variant of the Simple Arduino Music Keyboard but this time using touch capacitive sensors. Basically a keyboard with touch sensitive keys. This generates a tone internally, but it would relatively easy to change it out output MIDI commands.
- In Arduino Touch Piano – Part 2 I update the circuit for better performance and build a “shield” version.
- In Arduino MIDI Touch Piano I add a MIDI output.
These are the new Arduino tutorials for the main concepts used in this project:
If you are new to Arduino, see the Getting Started pages.
Parts list
- Arduino Uno
- 8 ohm speaker or old headphone speaker
- 1x 220 resistor
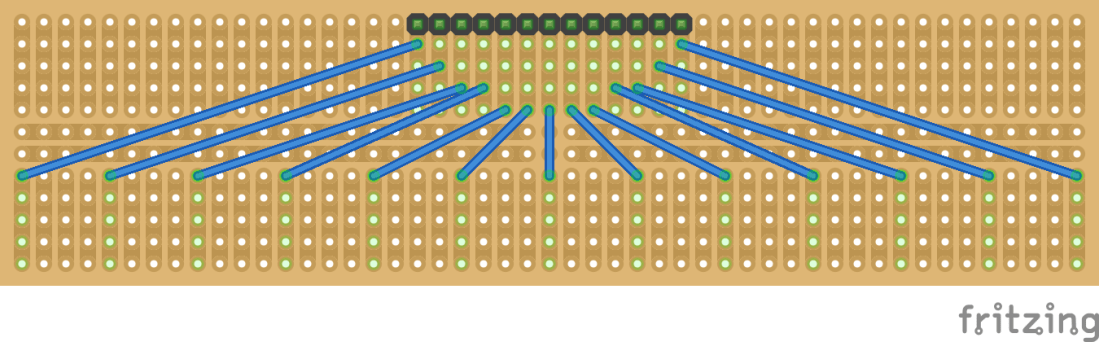
- 13x 1M resistors
- Breadboard and jumper wires
The Circuit


I used one of those prototype shield boards again, but it is a bit of a rats nest, so I’ve included the schematic which is a lot simpler!
I also built a “keyboard” using a piece of cheap prototyping stripboard as follows. I bent the wires either up or down to create the white and black notes of a one octave keyboard. You can get stick-on metal tape which could be used to make some proper pads, but I didn’t bother with that for now for this project.
The Code
This code uses the CapacitiveSensor library which can be found here: https://github.com/PaulStoffregen/CapacitiveSensor
This allows you to create a C++ “object” in code terms for each capacitive sensor – you just tell it which pins the sensor goes between – a common pin (2 in my case) and the specific sensor pin – so digital 3 to 11 and analog pins in digital mode 14-17. Then each instance of this code has a capacitiveSensor() call that will get the value and handle all the weirdness associated with running the sensor for you.
I’ve used on programming trick here, which is actually a bit nasty to tell the truth and proper C and C++ programmers might shudder at the thought … but I’ve created a list of pointers to each of my cs_ objects so that when it comes to checking them all I can just cycle through the list calling the appropriate sensor function in turn.
These kinds of sensors are quite sensitive to their environment, so it may take a bit of fiddling to get right. I’ve included a “debug” output in terms of printing the sensor values to the serial port (use the Arduino IDE’s built in “serial monitor” function to see it) so you can see the range of values it gives you when you touch the sensors. This should allow you to set the SENSOR_THRESHOLD value to something that causes a reliable trigger for you. One time I ran it, a value of 1500 seemed to work well. When I added the “keyboard” it seemed to get on better with a value of 500. Experiment!
Closing Thoughts
This is a very fiddly project to get right, but it does lend itself to fun experiments. You can hook up the sensors to other things – fancy making a fruit piano? Or you can use metal tape or conductive ink to “draw” an alternative keyboard design. You might even be able to use a pencil and draw out a keyboard using the graphic marks on the paper as the “pad” for the conductor.


This also lends itself to generating MIDI, but I think if I’m going to do anything else with this I’ll commit the circuit to a soldered stripboard rather than rely on all those wires pushed into a breadboard.
But if you really want to get serious about touch-sensitive music, then it would be worth getting a capacitive sensing shield or breakout board based on the MPR121.
Or if you want the ultimate simplicity and maximum play value, and don’t mind the expense, get a TouchBoard from Bare Conductive.
Kevin
