I have a range of synthesizer chips and modules and some of those come on shields but I needed a way to hook up some potentiometers in a simple manner for testing and playing around. To date I’ve build separate modules (some examples here and here).
One thing I often find is that music shields don’t always make it easy to connect to the analog pins on the Arduino, so I wanted a stackable shield that allowed access to A0 to A5. If it also allowed me to hook up a MIDI link to RX then all the better! This is the result.
This is a “beginner” project if you are comfortable with soldering. If not, it would be worth following some soldering tutorials first.
These are the key Arduino tutorials for the main concepts used in this project:
If you are new to Arduino, see the Getting Started pages.
Parts list
- Arduino Uno
- 4x 10k small “trim pot with knobs” style potentiometers
- 4x jumpers
- 1x spst miniature pcb mounted switch
- Proto shield and jumper wires
- Set of Arduino stackable headers (1x 6 way, 2x 8 way, 1×10 way)
The Circuit

I don’t have a fritzing part for my simple proto shield, but the one I use looks like this, which is approximated by proto board in the above fritzing diagram.

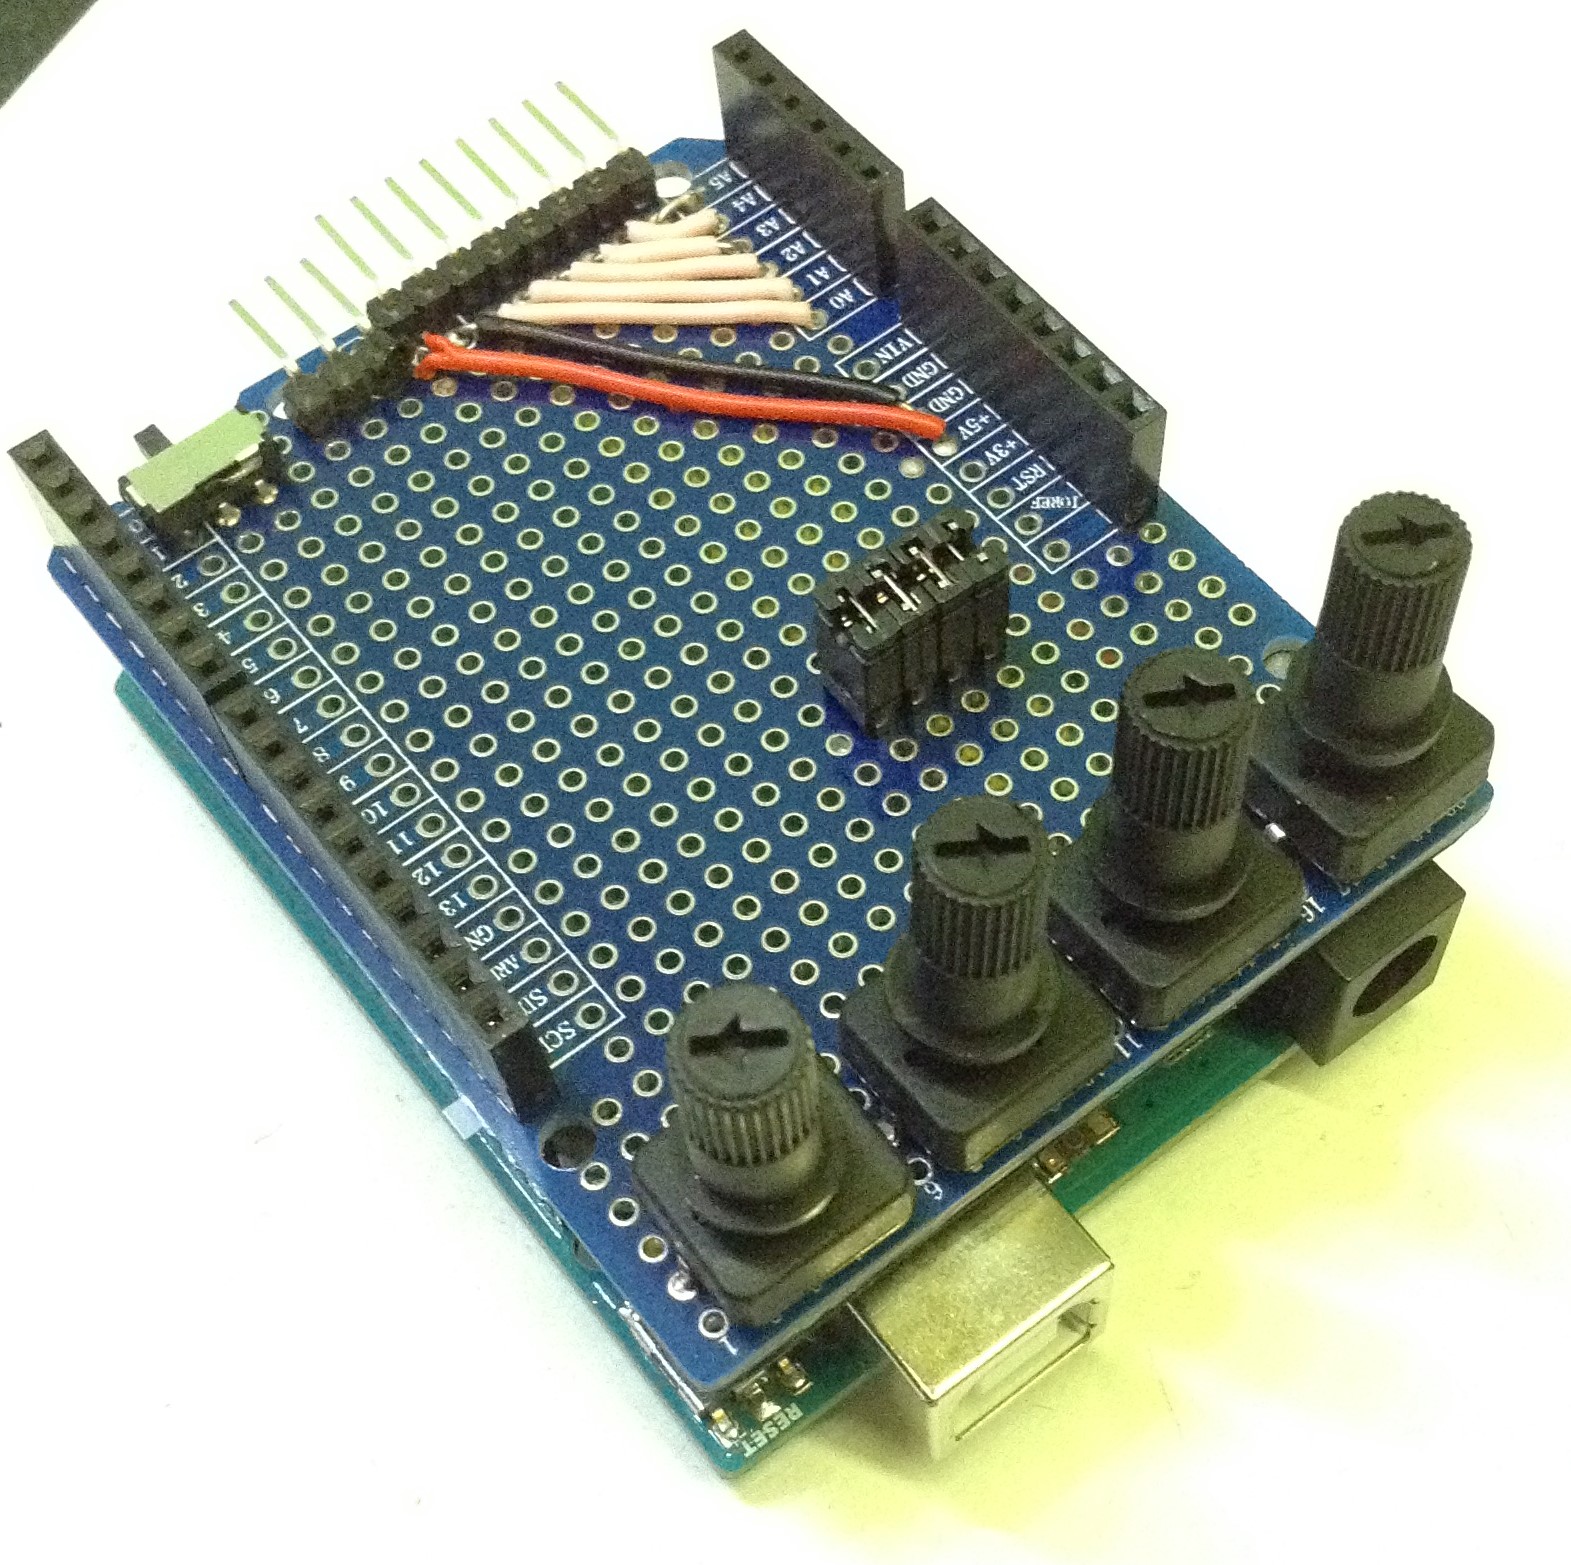
To make this stackable I need break out the analog pins to a header, which you can see on the right hand side. But I also have some small potentiometers with removable knobs (search for “thumb adjust presets”) that are short enough to be left on the pcb and not stop me stacking another shield on top:

In fact, placing them on the extreme left as shown means that if I have a shorter shield on top there might still be room to use the knobs anyway. The use of the pots can be disabled by removing the included jumpers, so I’m leaving plenty of options here.
The downside of locating them on the extreme left though is that there is the possibility of shorting against the USB connector of an Arduino Uno – so it is a good idea to cover the solder side with insulating tape.
I’ve included a header for RX, 5V and GND which can be connected to a MIDI in module. The RX is linked to the header via a small switch which can be used to disable the MIDI link while uploading code to the Arduino.
Here are some photos of my completed shield.


The Code
There is no real code for this one at present, but the following is a useful test programme to ensure that the built-in potentiometers are working ok.
void setup() {
   Serial.begin(9600);
}

void loop() {
   for (int i=0; i<4; i++) { // Change to 6 to read all six
      int aval = analogRead(A0+i);
      Serial.print(aval);
      Serial.print("\t");
   }
   Serial.print("\n");
   delay(100);
}
This could relatively easily be used with any of the existing Arduino synthesis projects, for example the Arduino Multi-pot Mozzi FM Synthesis.
Closing Thoughts
This should allow me to do some simple experimenting with a whole range of synthesizer shields, chips and modules in a very simple manner.
They tend to be a little niche though so I don’t know how many of them will make it here, but if there is something that I think might be of interest, I’ll add it to the site.
Kevin
