Here are the build notes for my Raspberry Pi Pico MIDI Touch Keyboard PCB.

Warning! I strongly recommend using old or second hand equipment for your experiments. I am not responsible for any damage to expensive instruments!
If you are new to microcontrollers, see the Getting Started pages.
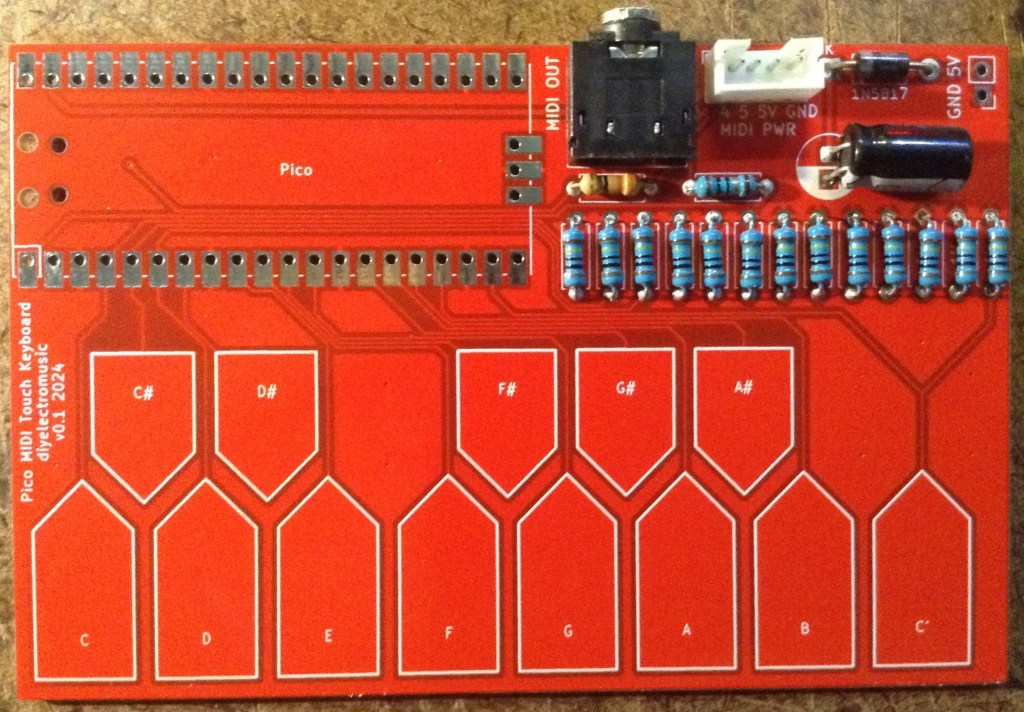
Bill of Materials
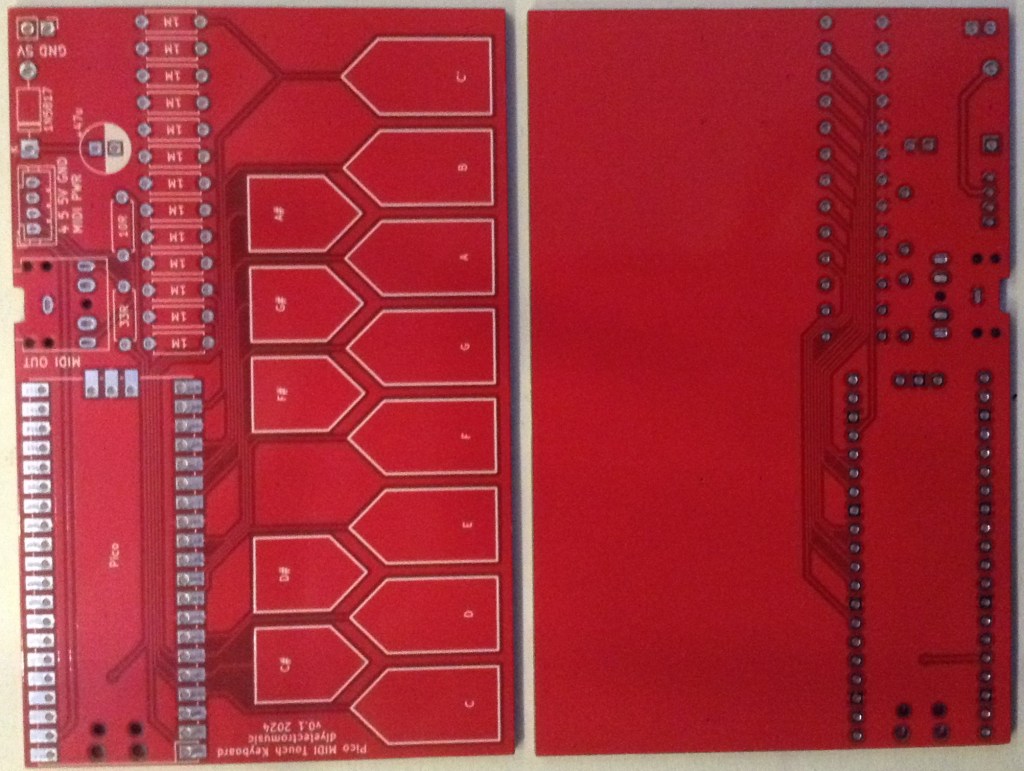
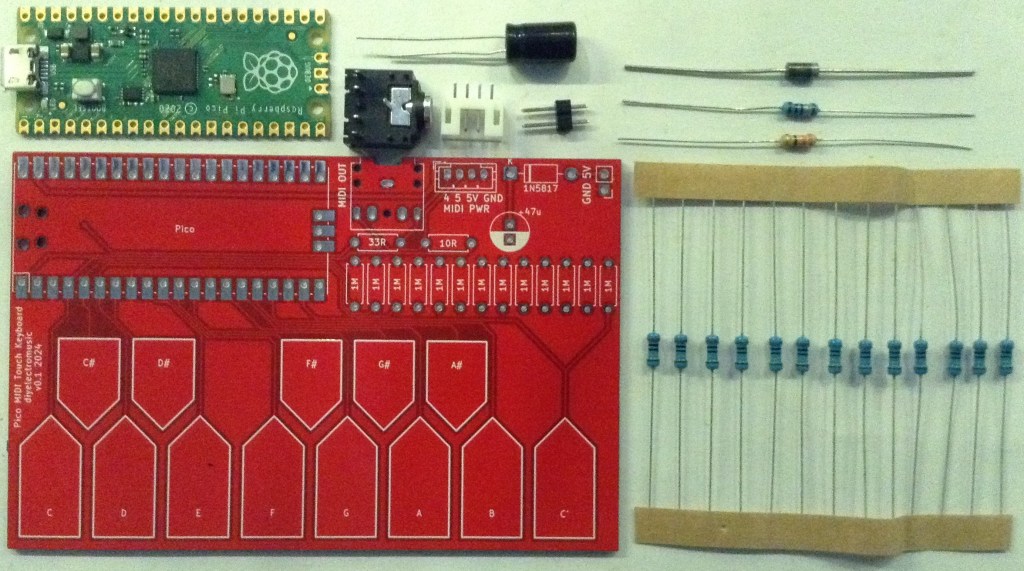
- Raspberry Pi Pico Touch Keyboard PCB (GitHub link below)
- Raspberry Pi Pico
- 1x 1N5817 schottky diode
- 1x 10Ω resistor
- 1x 33Ω resistor
- 13 x 1MΩ resistors
- 1x 47uF electrolytic capacitor
- 1x 3.5mm stereo jack TRS socket (see photo and PCB for footprint)
- 1x 4-pin JST SH header (optional)
- 1x 2-pin jumper header (optional)
- 2x 20-pin header sockets (optional)
Build Steps
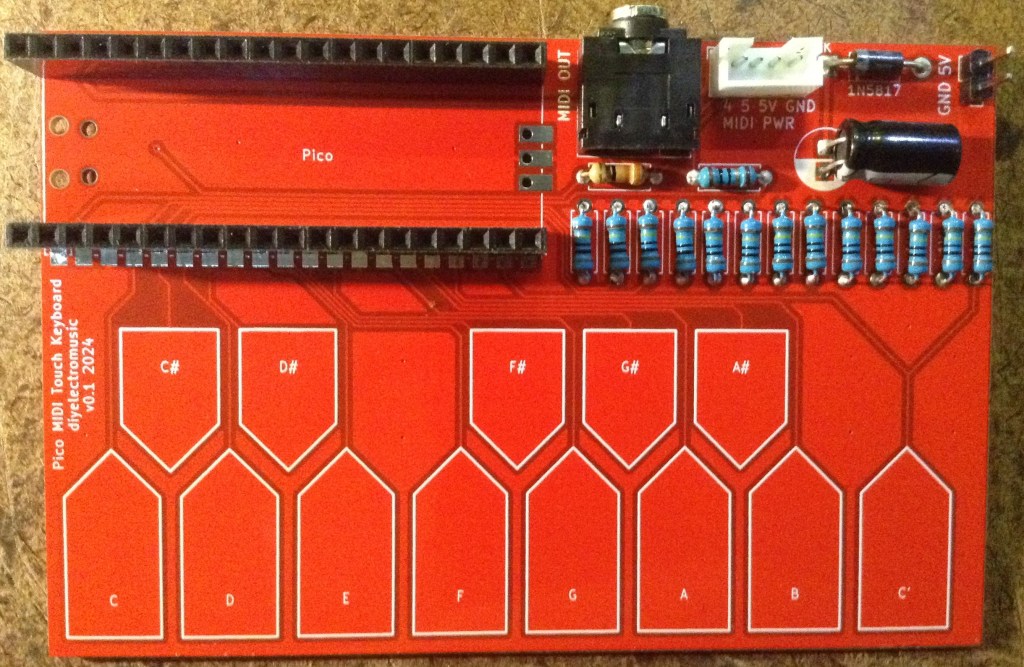
Taking a typical “low to high” soldering approach, this is the suggested order of assembly:
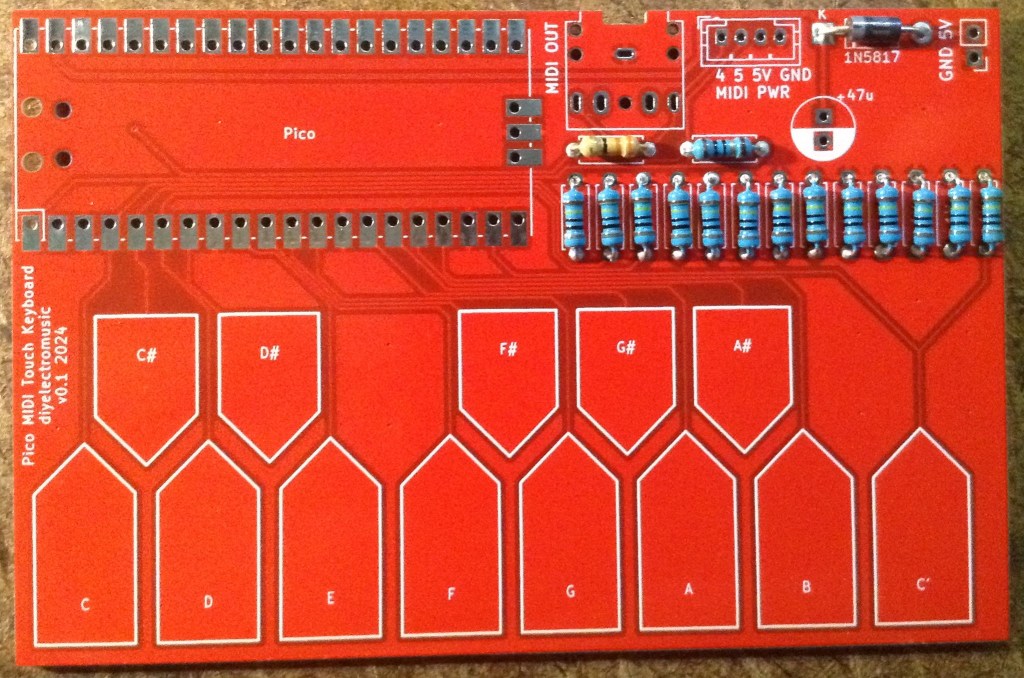
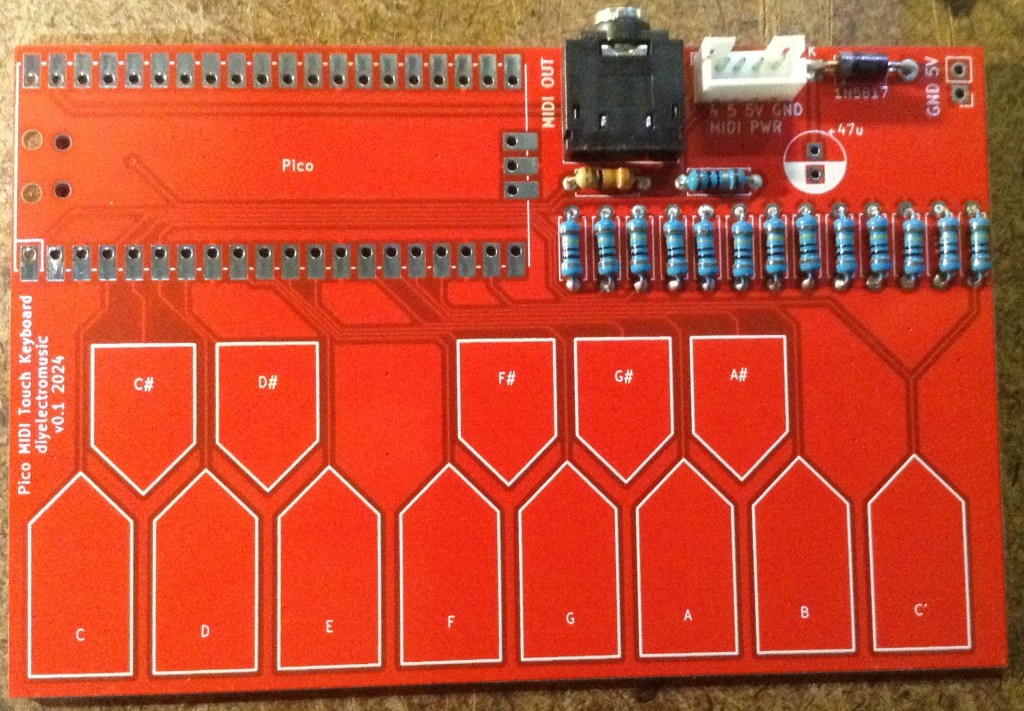
- All resistors and diode.
- Raspberry Pi Pico (if not using header sockets).
- TRS and JST SH socket (if used).
- Electrolytic capacitor (if folded down).
- Header sockets and pin header (if used).
Here are some build photos.
Testing
I recommend performing the general tests described here: PCBs.
See below for a sample application.
PCB Errata
There are the following issues with this PCB:
- None at present.
Enhancements:
- I could have used a dual TRS/DIN footprint for the MIDI out socket.
- Other control pads could be added – e.g. an octave +/- button.
Sample Application
The Circuitpython code from Raspberry Pi Pico Capacitive Touch can be used here too.
The GPIO configuration is as follows for notes C4-C5:
touchpins = [board.GP2, board.GP3, board.GP4, board.GP5, board.GP6, board.GP7, board.GP8, board.GP9, board.GP10, board.GP11, board.GP12, board.GP13, board.GP14]
midinotes = [60, 61, 62, 63, 64, 65, 66, 67, 68, 69, 70, 71, 72]
Of course the range of MIDI notes could be any 13-note sequence, including non-consecutive notes if required! Using 48-60 will configure the keyboard for C3 to C4 for example.
This application supports both USB MIDI, via the Raspberry Pi Pico’s USB socket, and serial MIDI via the TRS socket.
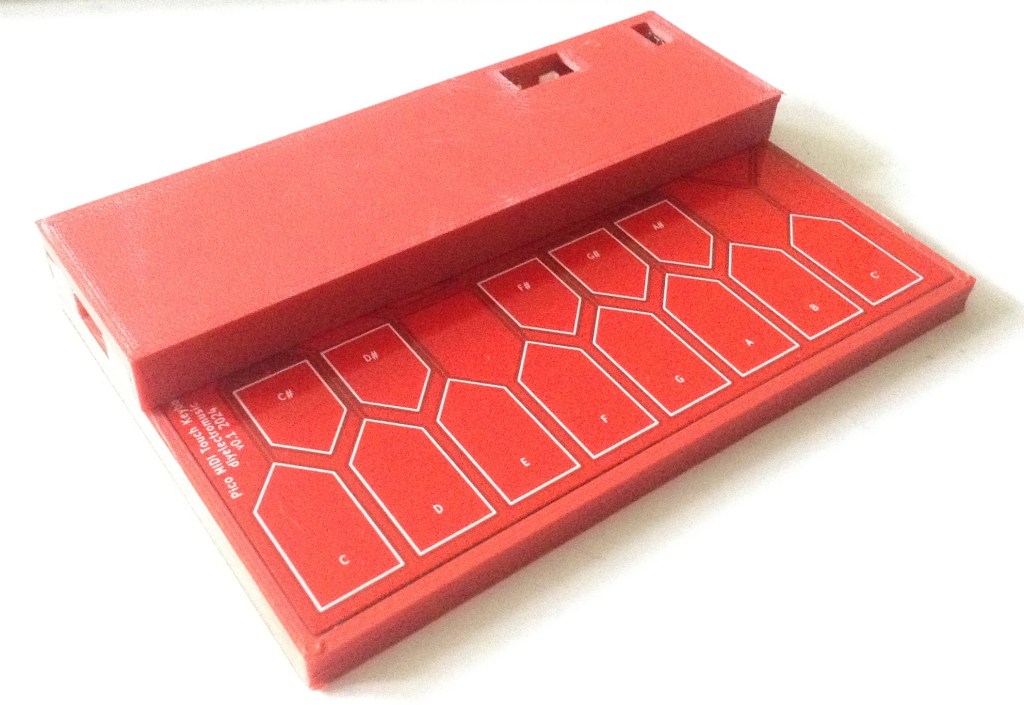
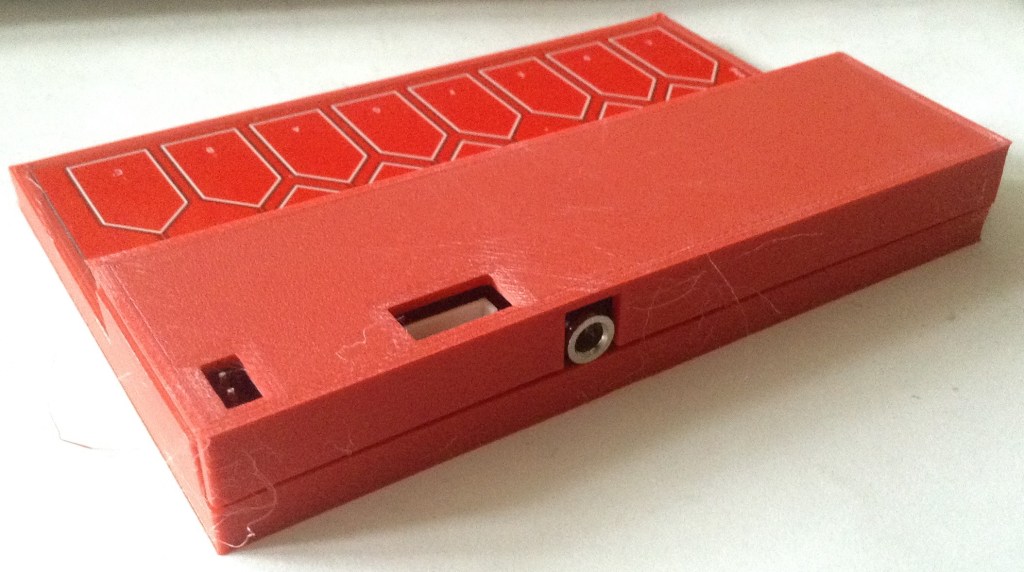
3D Printable Case
I’ve uploaded a simple 3D printable case to the GitHub repository too: https://github.com/diyelectromusic/sdemp_pcbs/tree/main/PicoMIDITouchKeyboard/Case.
There are two STL files, the main case (bottom) and the top. The top will need rotating 180 degrees (i.e. turning upside down) before slicing.
The two halves should just snap together, although it isn’t a particularly strong fit, it was good enough for me.
Closing Thoughts
Some further optimisation of the code might be useful, but in general terms this seems to work pretty well.
The video above shows it driving one of the performance sounds of MiniDexed running on a Pi 3A+ using USB MIDI.
Kevin
