Following on from my Arduino Audio Experimenter Shield PCB here is another shield, this time more optimised for experiments with the Mozzi synthesis library for Arduino.
Update: Build notes are now available here: Arduino Mozzi Experimenter Shield PCB – Part 2
Warning! I strongly recommend using old or second hand equipment for your experiments. I am not responsible for any damage to expensive instruments!
These are the key Arduino tutorials for the main concepts used in this project:
If you are new to Arduino, see the Getting Started pages.
The Circuit
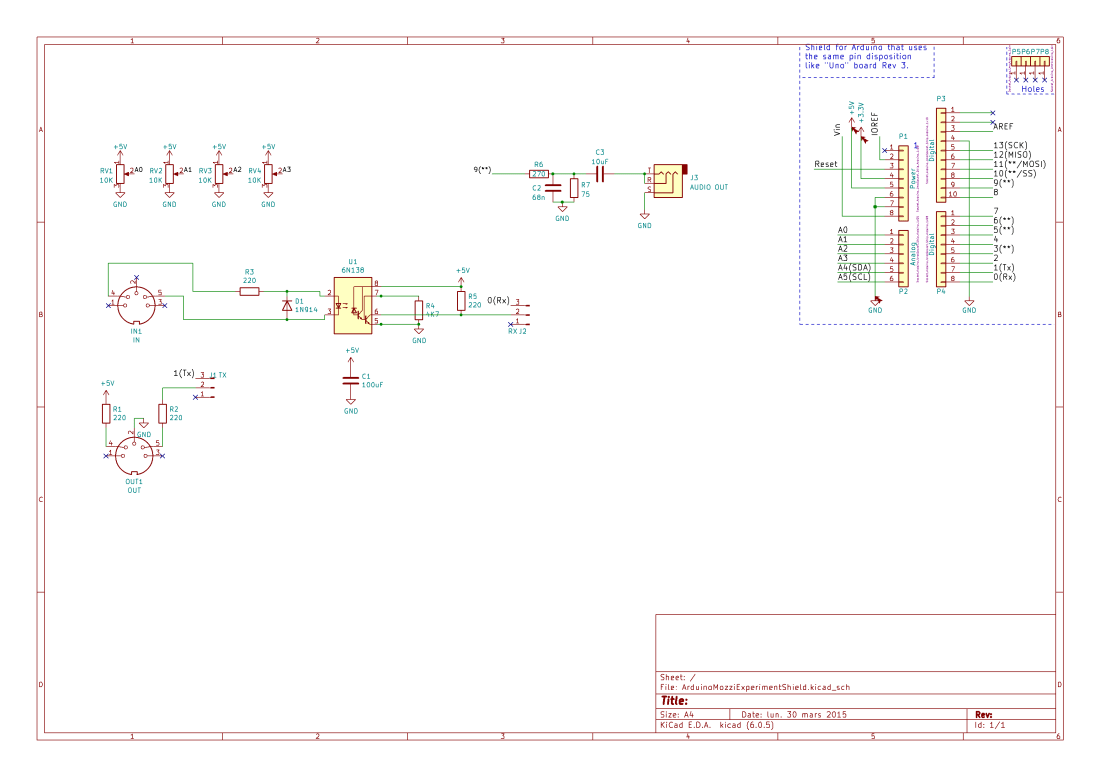
The circuit provides the following functionality:
- Four potentiometers hooked up to the Arduino’s A0-A3.
- MIDI IN and OUT hooked up to the Arduino’s RX/TX.
- A Mozzi Output Circuit and an audio out jack.
The MIDI links are connected via jumpers to allow the MIDI interface to be disabled if required to allow the upload of sketches. The audio output is a mono output, but going to both channels of a stereo TRS jack socket.
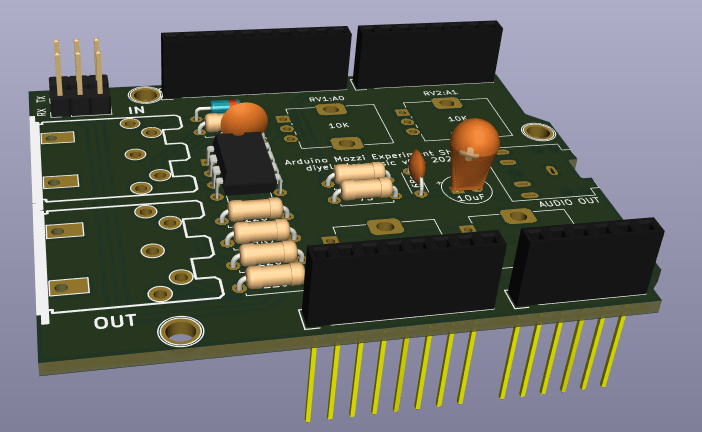
PCB Design

The four potentiometers are pcb mounted and MDI is provided by two DIN sockets. The whole thing is kept within the footprint of a standard Arduino Uno shield. This is why there are only four pots – it wasn’t possible to fit in more and keep both MIDI and the audio output.

Closing Thoughts
This is another shield that I’m hoping will make experimenting with Mozzi a bit easier, containing everything that is required for a basic 8-bit synthesizer.
Coincidentally as I was designing this (and after it had been sent off) Arduino brought out their Make your Uno kit which includes a simple synth shield.
But I think the purposes of the official shield and mine are different. The official shield provides a “worked example” for learning how to solder. It includes 5 pots and a volume control for the on-board amplifier and includes a directly connected speaker. It is a very neat, self-contained project with all components provided and a couple of smaller practice projects before you start building your own Arduino Uno and shield.
Whereas for mine, I wanted MIDI but instead require the use of an external amplifier and output, and I’m not bothered about this teaching anyone how to solder and I’m assuming a ready-made Arduino Uno.
This is one of a new set of boards I’ve now sent off to Seeed Fusion for manufacturing, using some discount vouchers I’ve been sent.
Kevin
