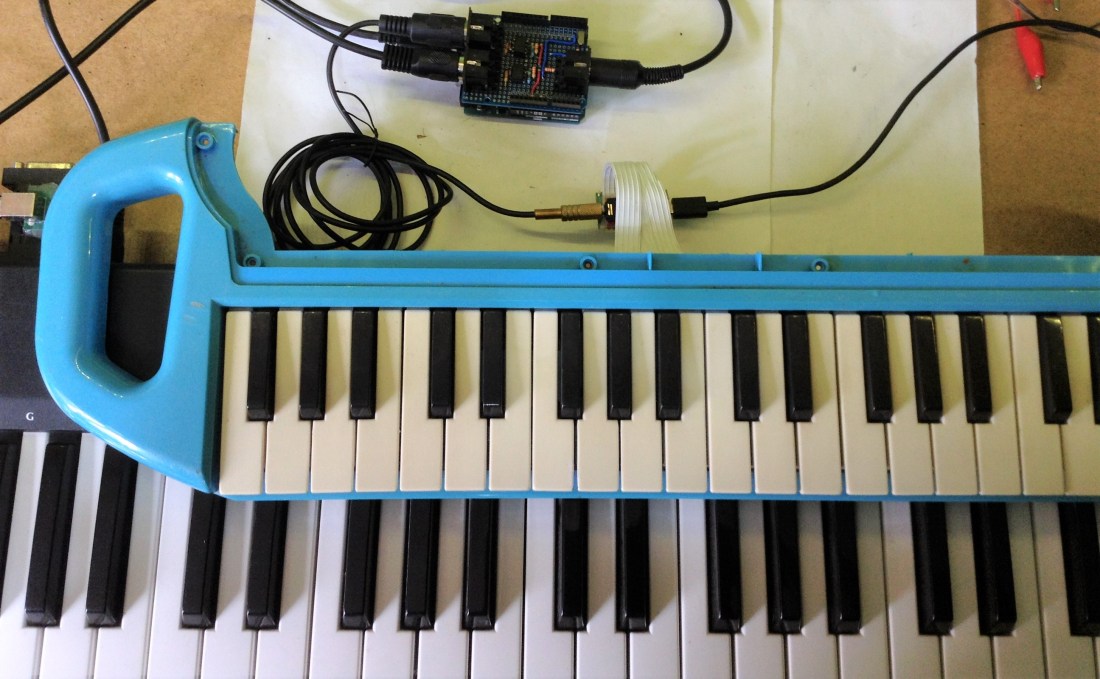
Having spent some time now playing with a range of MIDI merge options, one final thing I wanted to do was have a “merge shield” that could quickly turn an Arduino Uno into a simple two-in, one out MIDI unit.
Warning! I strongly recommend using old or second hand equipment for your experiments. I am not responsible for any damage to expensive instruments!
These are the key Arduino tutorials for the main concepts used in this project:
If you are new to Arduino, see the Getting Started pages.
Parts list
- Arduino Uno
- Protoboard “shield” (see photos)
- 2x 6N138 optoisolators
- 2x 8-pin DIP sockets (optional)
- 6x 220Ω resistors
- 2x 4.7kΩ resistors
- 2x 1N914 diodes
- 2x 100uF capacitors
- 3x 5-pin MIDI DIN sockets
- 1x DPDT miniature switch (optional)
- Headers and jumper wires
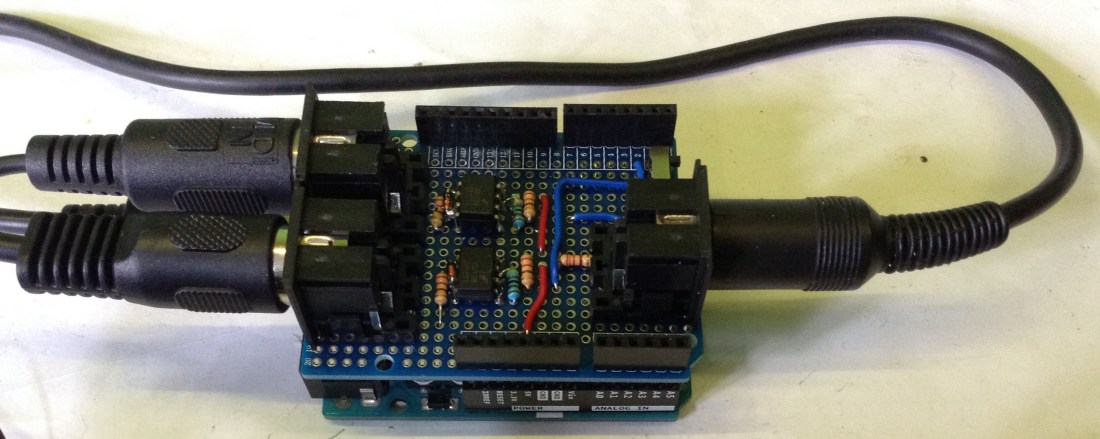
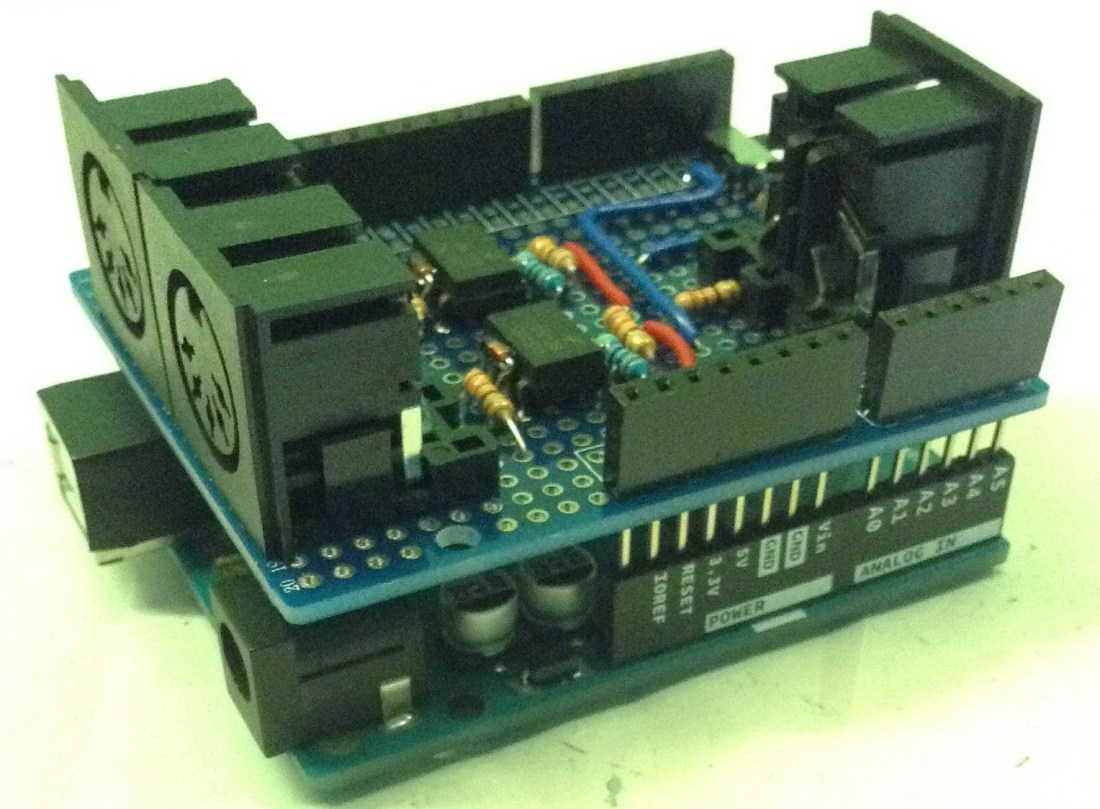
The Circuit

This looks complicated, but really it is just a standard (5V) MIDI OUT circuit connected to TX (on the right) and two standard (5V) MIDI IN circuits, each using a 6N138, connected to RX and D2 respectively (on the left). I’ve used a series of 7 single-pin headers to show the “footprint” of the MIDI sockets I use all the time.
I’ve include a switch between RX/TX and the circuit to allow me to disable the MIDI circuit if I need to but that is optional. If you don’t use a switch you’ll have to disconnect the shield to upload a new sketch.
Here are a few photos of my build.


The finished thing sits nicely on an Uno as long as you check that your headers are long enough that the DIN socket pins don’t short out on the Uno’s USB connector, or you somehow insulate the connector itself.
The Code
This is using the code from Arduino Multi MIDI Merge or Arduino Multi MIDI Merge – Part 2 with the following configuration:
#define MIDI_HW_SERIAL 1
#define MIDI_SW_SERIAL 5
#define MIDI_OUT MIDI_HW_SERIAL
This presents a hardware serial interface using RX/TX for MIDI IN (bottom circuit) and MIDI OUT and a software serial interface (top circuit) for MIDI IN on D2.
Closing Thoughts
This project has actually caused me quite a bit of grief, but not because it was particularly complicated… but because when I first tested it, the bottom circuit worked fine, but the top one didn’t. After all sorts of messing around trying to work out what was wrong, it turned out that the 6N138 optoisolator I was using must have been faulty. Not only that, the one I replaced it with didn’t work either!
It was only after using a third (from a different batch), verifying it on a breadboard first, and then slowly patching in parts of my built circuit to replace the breadboard, and then finally soldering /that/ 6N138 back onto the board that it all worked.
Lesson: Always test your components before soldering if you can! Although I doubt I’ll remember that next time I’m impatient to complete my next build…
Kevin