One project I’ve had my eye on for some time is Dexed: “Dexed is a multi platform, multi format plugin synth that is closely modeled on the Yamaha DX7”.
More specifically I noticed there was a version for the Teensy called microDexed that I really wanted to try; that it is also one of the synth engines on Zynthian so I could have a play with that too; and that there was also a port of Dexed for the Raspberry Pi Pico.
But it has remained on the “ideas list” until this week, when I saw that a new version – MiniDexed, for “bare metal” Raspberry Pi – was making the rounds on maker/hacker social media thanks to an enigmatic video by Floyd Steinberg (who I follow on YouTube): “MIDIDEXED – honey, I shrunk my DX7 collection”.
Like all of his videos, he has made this very appealing, with a great demonstration and many tantalising hints (they are never complete “howto” videos) of how to do it.
Noting that this runs using the same “bare metal” environment used for the MT32-Pi that I’ve also been playing around with myself, and that it also supports all Pis back to the original, was the catalyst for me to jump in and finally take a look.
Further posts on this topic take this further:
- “Bare Metal” Raspberry Pi MiniDexed DX7 – Part 2 – Builds a Protoboard “shield”.
- MiniDexed Raspberry Pi IO Board – PCB Designs for Pi 2,3.
- MiniDexed Raspberry Pi V1 IO Board – PCB Design for Pi V1.
- RPi Zero MiniDexed IO Board PCB Design – PCB Design for Pi Zero.
- Rebuilding my Ability to Build MiniDexed – How I recreated my development environment to build MiniDexed from scratch.
Warning! I strongly recommend using old or second hand equipment for your experiments. I am not responsible for any damage to expensive instruments!
These are the key tutorials for the main concepts used in this project:
Here is a list of all my MiniDexed posts: https://diyelectromusic.wordpress.com/tag/minidexed/
If you are new to microcontrollers, see the Getting Started pages.
Parts list
- Raspberry Pi (any version, but not the Pico) and suitable SD card.
- LCD 1602 (without the I2C adaptor).
- Rotary encoder (“KY-040” type module).
- 10k potentiometer.
- Optional: Pi Cobbler (Plus) and breadboard.
- Optional: I2S PCM module.
- Optional: Serial MIDI interface for the Raspberry Pi.
- Jumper wires and connectors.
- MIDI controller (USB if not using serial MIDI).
- Amplification and Audio output.
The Circuit

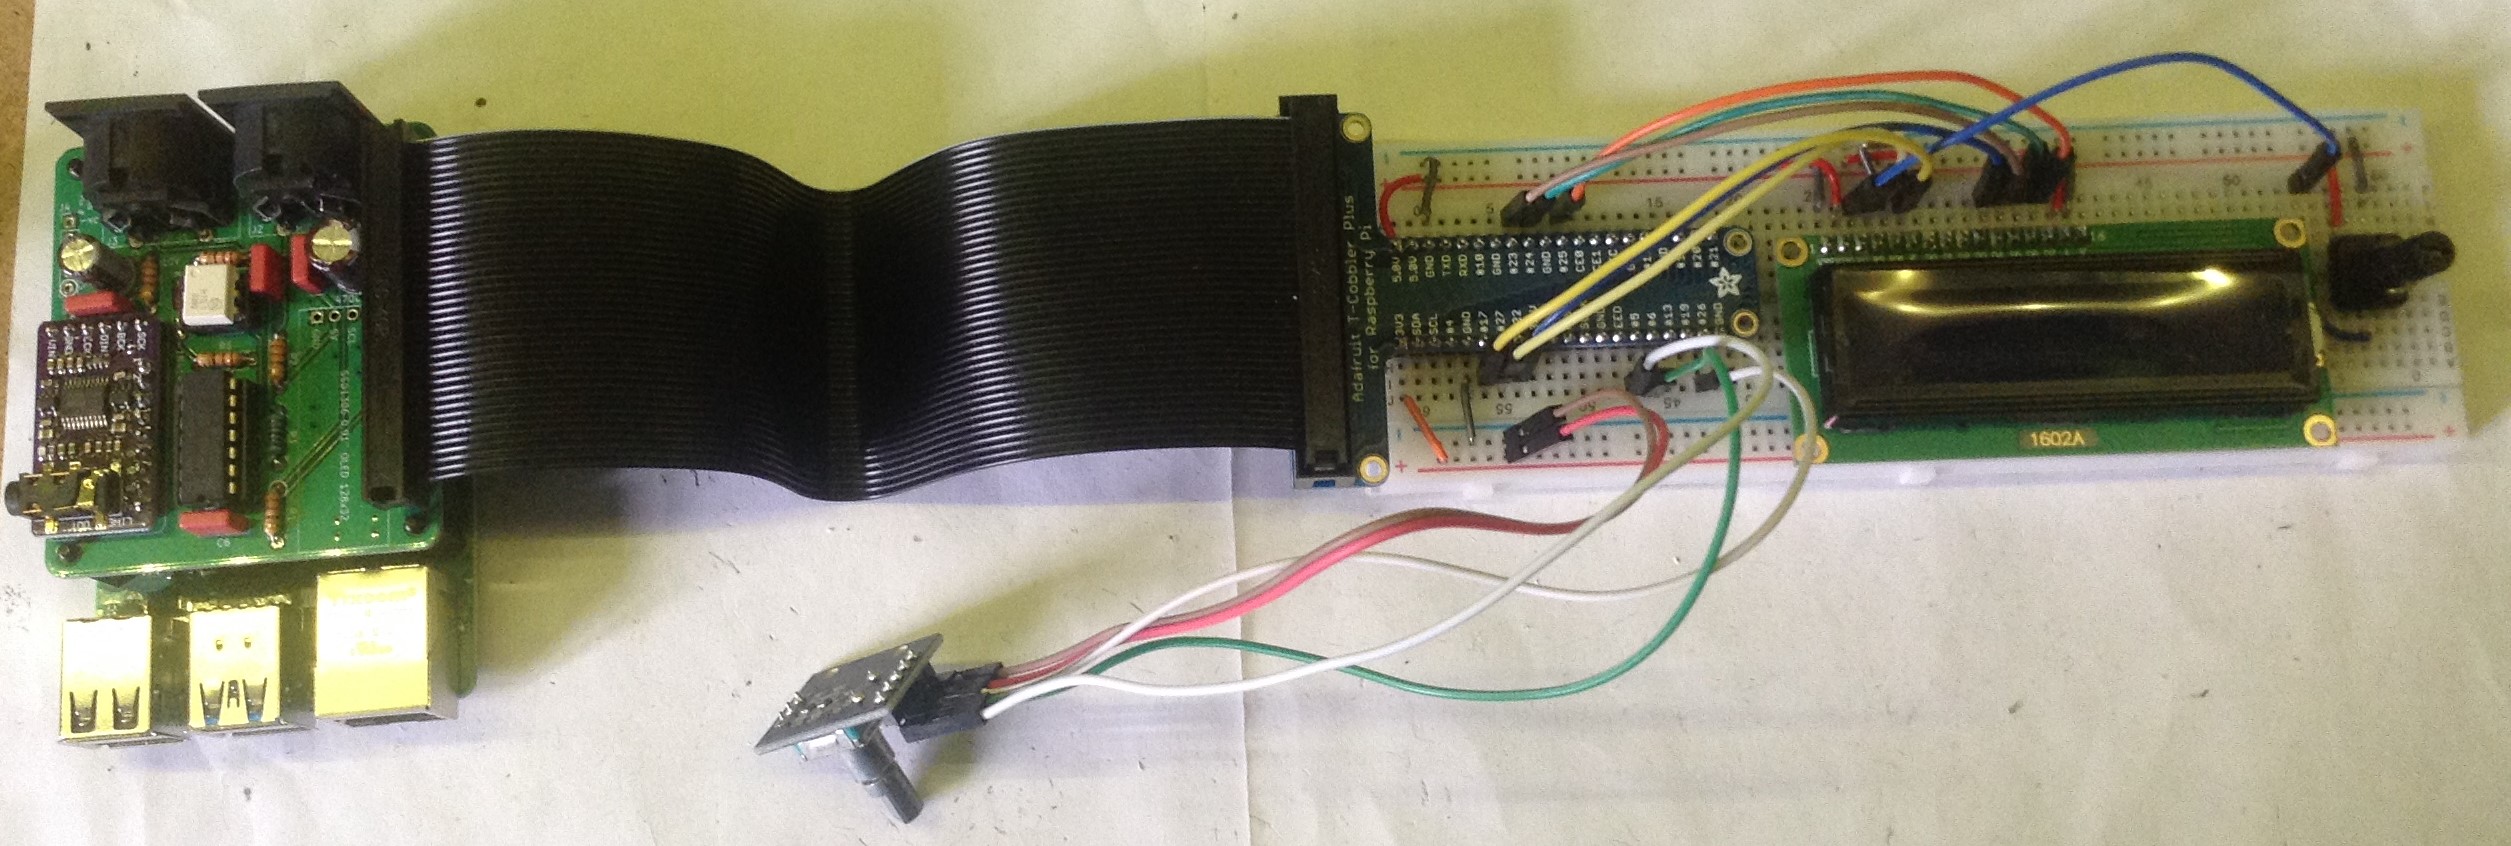
The above shows the circuit for the Raspberry Pi model B+ through to the RPi 4. Basically, any RPi with a 40-pin GPIO header. I’m using my Adafruit “Pi Cobbler Plus” to make it easy to wire up the IO, but of course you can simply connect everything directly if that works better for you.
Note the direction of the power links, especially to the LCD. I’ve managed to trash one of these displays by mixing up VSS (GND) and VDD (5V) already!

This is the same circuit for a Raspberry Pi Model B V1. Again I’m using an Adafruit Pi Cobbler – but note that the orientation of the ribbon connector is different for the 26 pin version compared to the 40 pin version! If you get it the wrong way round, you’ll end up sending 5V to your GND pin for the LCD… as I say, I’ve killed one doing this already!
The basic requirements call for some kind of LCD (the “1602” is the one usually used) and a rotary encoder to connect to your Pi, but there are many options. For the V1 version I’ve just used it as shown above, with the audio output coming via the Pi’s headphone socket.
For the Pi V4 version, in addition to the above, I used my Clumsy MIDI interface (with no I2C display) to provide an I2S DAC and serial MIDI links.

The pin-outs are described on the MiniDexed pages, but at the time of writing they are in a bit of a state of flux as a proposal for common pinouts for all versions of the RPi is going through. The proposal uses the following GPIO pins, so this is what I’ve used here too.
GPIO Type:     26-Way    40-Way
LCD EN           17        17
LCD RS            4         4
LCD RW          N/C       N/C
LCD D4           22        22
LCD D5           23        23
LCD D6           24        24
LCD D7           25        25
Encoder CLK      10        10
Encoder DT        9         9
Encoder SW       11        11
Note the LCD R/W pin has to be fixed to GND (something recommended by Adafruit in their 1602 tutorial here, to prevent any 5V logic signals going back from the LCD to the 3V3 Pi).
In addition to the above, the UART on GPIO 14/15 can be used for a serial MIDI interface for both types of board; and GPIO 18, 19, 21 on the 40-way boards can be used for an I2S link to an external DAC (as I say, I used my Clumsy MIDI for this).
If you have a V1 Model B Revision 2 board (the one with the 26-way GPIO and additional 8-way P5 header) then it can be used with an external I2S DAC too. I’ve successfully used a PCM5102 using this route as described here: Raspberry Pi I2S Audio Interface, although it isn’t shown in the photos below.
The Code
The installation procedure is relatively straight forward, but there are a few key bits of information that whizz past in the video without explanation, and weren’t really mentioned in detail in the MiniDexed “Usage” instructions either, so I’ll expand on my own process a bit more here.
- Download the latest release of MiniDexed and expand the contents of the ZIP file somewhere convenient. I used the last proper release, not the continuous build, and you need the dated, non-source ZIP file (I used MiniDexed_2022-04-16.zip).
- The entire contents of this ZIP file should be copied to the root directory of your (otherwise blank) SD card.
- You will need some voices! The MiniDexed instructions give some links to roms in the “Features” part further up (not in the “Usage” instructions) but to use them you have to do the following:
- Create a sysex/voice subdirectory on the SD card.
- Copy your chosen roms over to that subdirectory. For the standard DX7 voice set, I think it is the following: rom1a to rom4b from the Yamaha Black Boxes collection or the contents of “Original Yamaha” and “DX7 ROM1” to “DX7 ROM4” from Dexed_Cart_1.0.ZIP.
- Name them with the format nnnnnn_VoiceBankName.syx where nnnnnn is the bank number with leading zeros. So if you are using the eight ROM files I mentioned above, they should be named (I think): 000000_rom1a.syx, 000001_rom1b.syx, 000002_rom2a.syx, 000003_rom2b.syx, 000004_rom3a.syx, 000005_rom3b.syx, 000006_rom4a.syx, 000007_rom4b.syx. This places the voices in each file on banks 0 to 7, which you can select from the Dexed menu.
- Some configuration file changes are required to the minidexed.ini and performance.ini files, as detailed below.
When first starting up it is worth having an HDMI monitor connected so you can see the progress. Typical errors I found were things like:
- having the wrong directory name for the voices (sysex/voice, not sysex/voices);
- having roms with the wrong format of filename (“Invalid filename format”);
- LCD or encoder not working, probably means an error in the physical wiring somewhere (it is always worth double and triple checking before turning anything on!);
- Forgetting to change a GPIO number in the configuration file (see below);
- Having the wrong audio output device selected in the configuration file (see below);
- Having the wrong MIDI or voice configuration in the performance.ini file (see below).
minidexed.ini
This is where the main hardware parameters are specified. The defaults may work fine for you, but I needed to make sure the LCD and encoder GPIO pins matched those I’ve listed above.
For my V1 Pi using the built-in headphone socket, I left the audio device set to:
SoundDevice=pwm
For the V4 Pi, I was using my I2S PCM5102 DAC on my ClumsyMIDI board, so needed to change this to:
SoundDevice=i2s
This is also the same change to enable the I2S DAC via P5 for the V1 Model B Rev 2 board too.
The LCD and encoder sections should be self-explanatory. Just use the GPIO numbers that match the physical wiring being used. Note that the R/W pin is set to 0 (unused):
# HD44780 LCD
LCDEnabled=1
LCDPinEnable=17
LCDPinRegisterSelect=4
LCDPinReadWrite=0
LCDPinData4=22
LCDPinData5=23
LCDPinData6=24
LCDPinData7=25

# KY-040 Rotary Encoder
EncoderEnabled=1
EncoderPinClock=10
EncoderPinData=9
EncoderPinSwitch=11
performance.ini
By default the system is set up to use four tone generators, all listening on all MIDI channels, with some detuning and effects and mapped across the left and right channels. This might make for a nice demo, but it isn’t very useful if you want to just try out different voices as you have to change voices on each tone generator independently (as far as I can see).
Consequently, I recommend changing the configuration to the following as a more “basic” starting point for experiments:
- Set each tone generator to listen to a single MIDI channel matching the TG number (so TG1 on MIDI channel 1, etc).
- Turn off the reverb and compression effects.
- Set the detuning to 0 for all tone generators.
- Set the pan value to 64 – “mid stereo field” – for all tone generators.
If you are using a V1 Pi then you only have one tone generator to play with anyway. This is the configuration I used for TG1 (and as I say, I changed the TG2 to TG4 MIDI channels too).
# TG1
BankNumber1=0
VoiceNumber1=1
MIDIChannel1=1
Volume1=100
Pan1=64
Detune1=0
NoteLimitLow1=0
NoteLimitHigh1=127
NoteShift1=0
ReverbSend1=0
In the effects section (at the end) I just disable both effects by default:
# Effects
CompressorEnable=0
ReverbEnable=0
Closing Thoughts
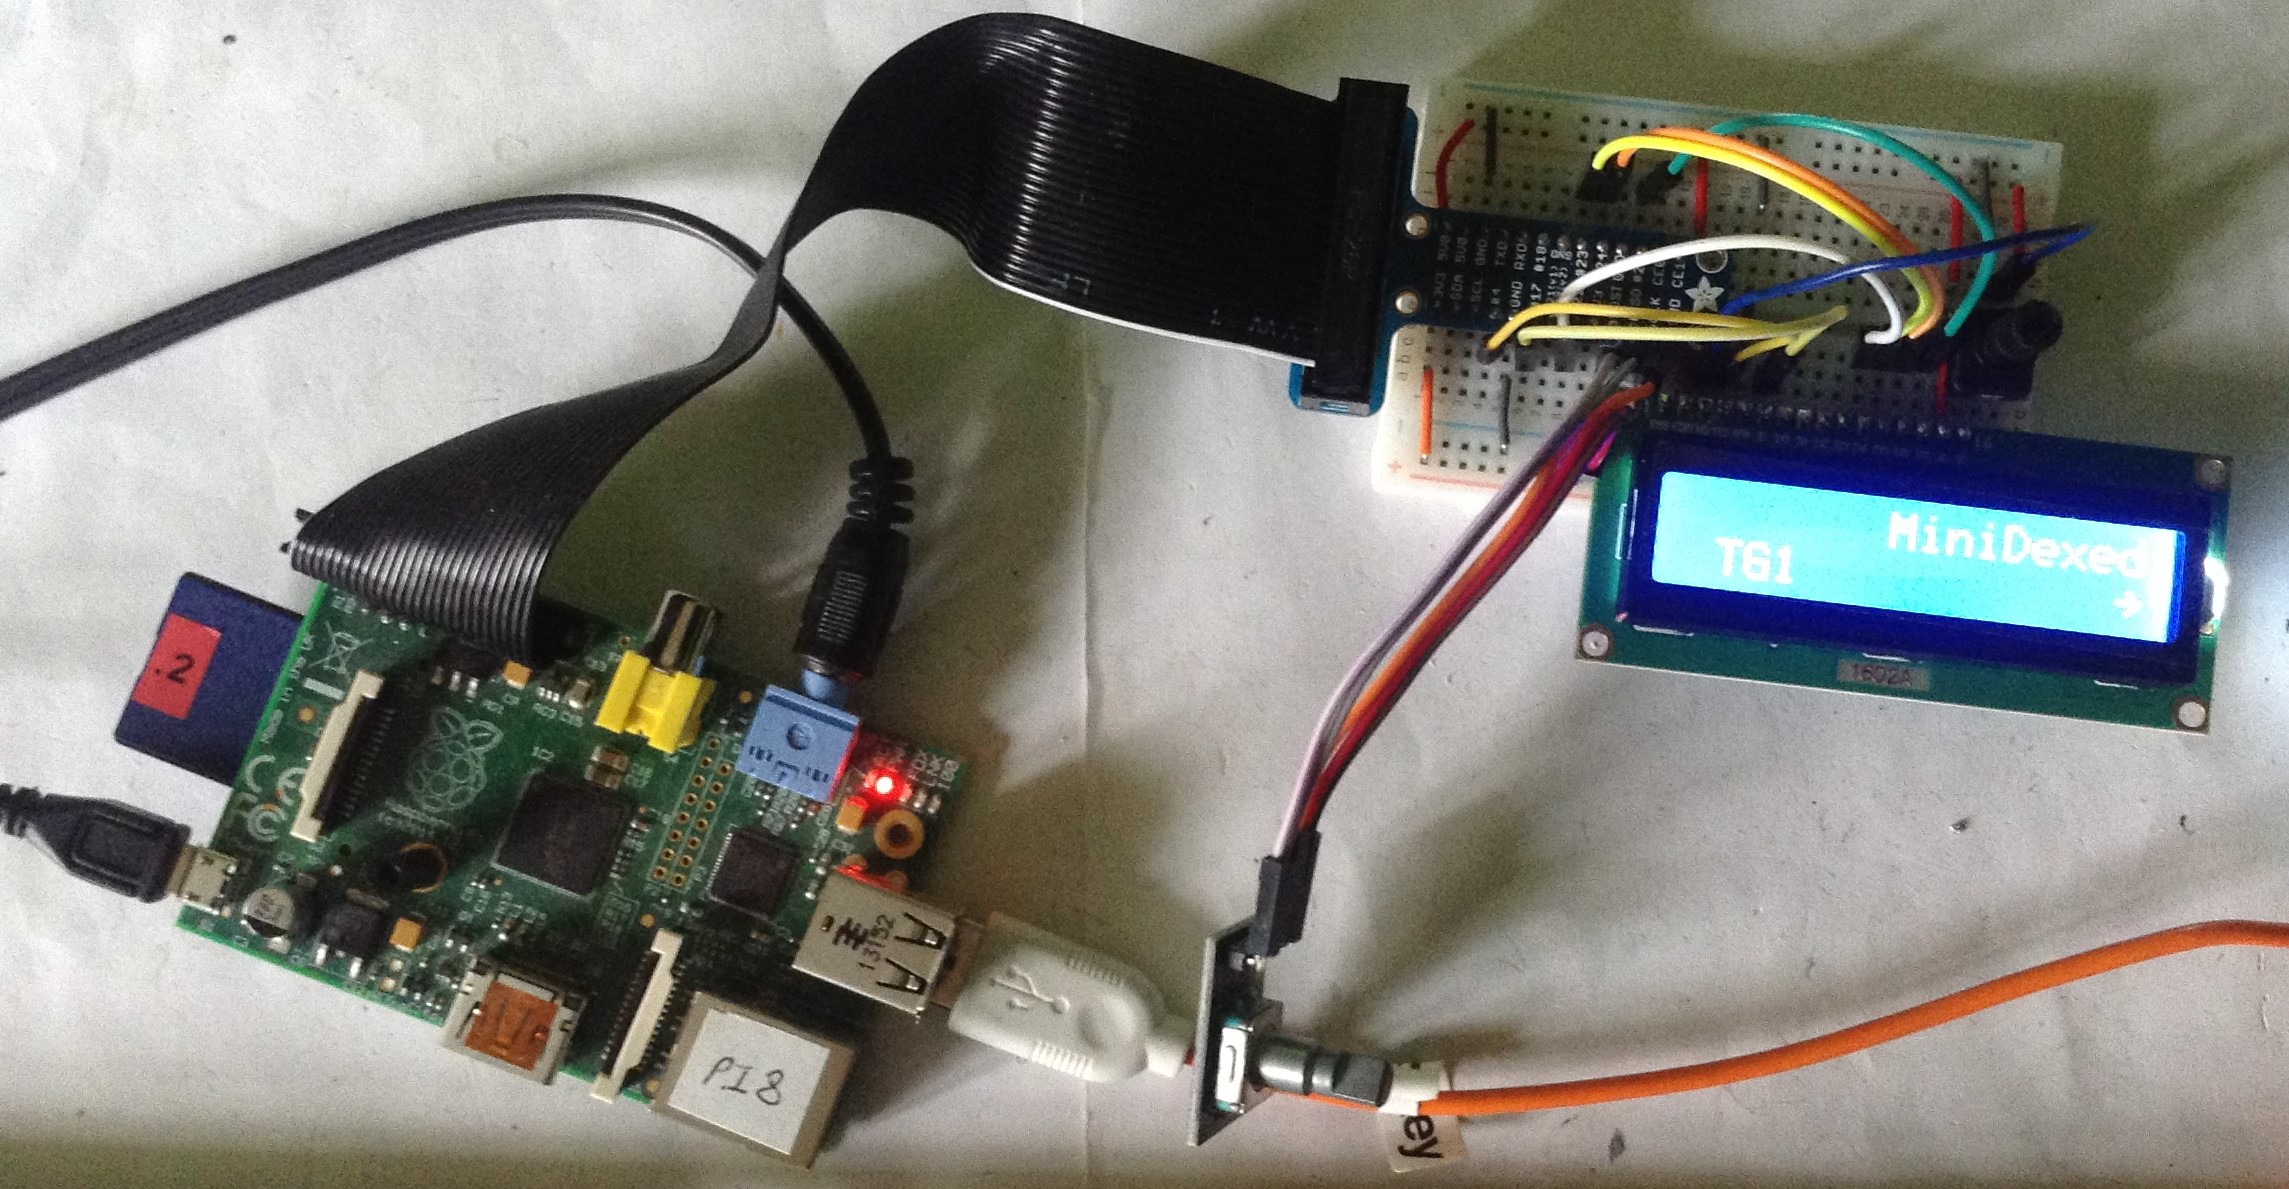
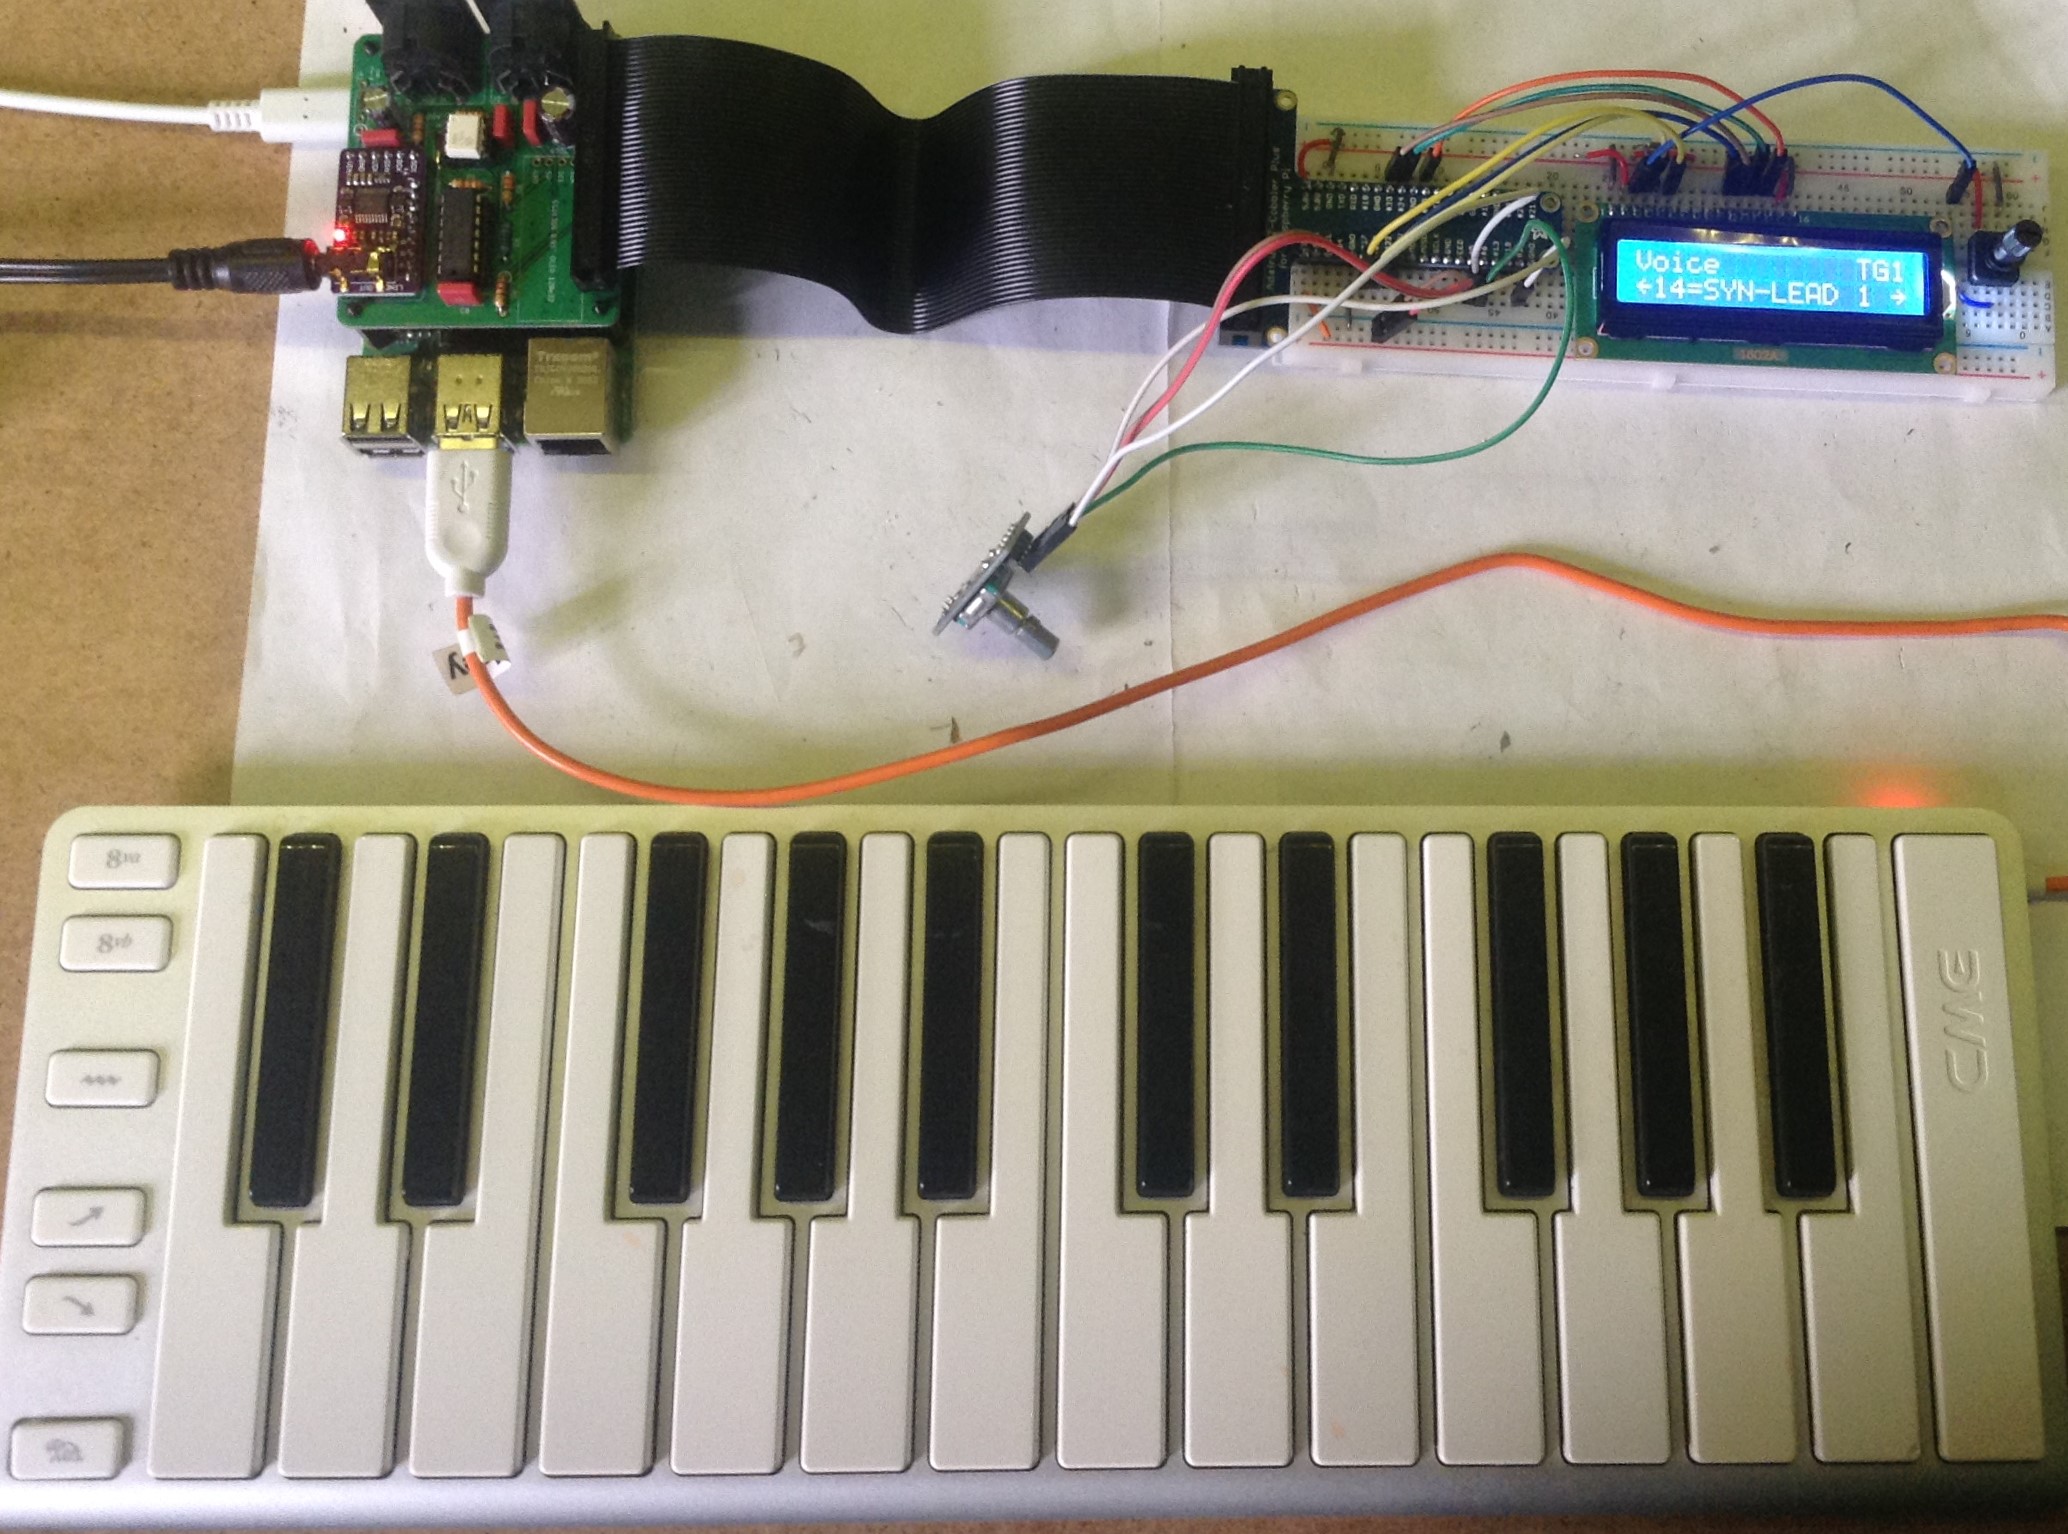
In the video you can see my V1 RPi running MiniDexed with a single tone generator. Basically it is acting as a single DX7. It would be great to get all the IO onto a single “Dexed Hat” to make for a neat self-contained unit or even build it all into a modular panel of some kind.
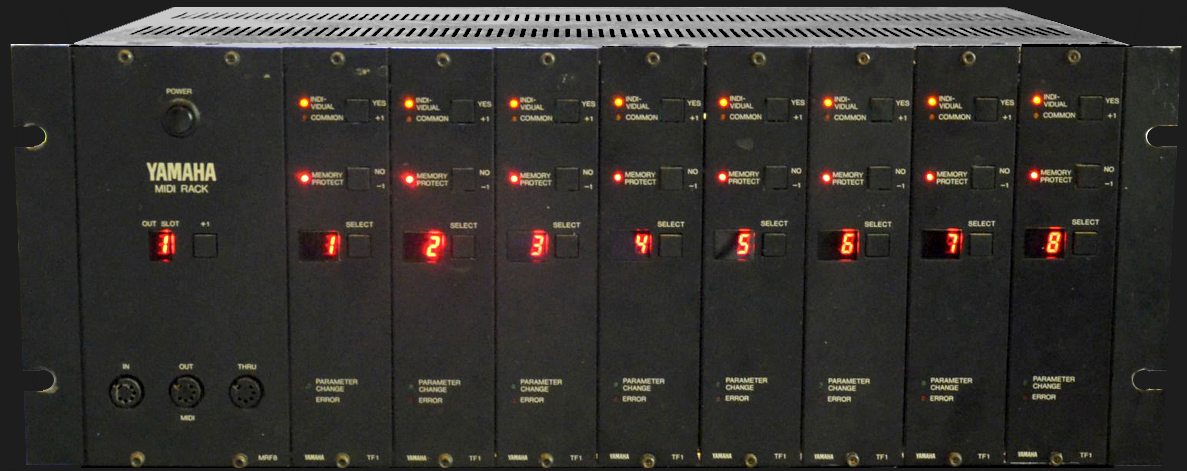
In the photo below, a RPi V4 is running 8 tone generators, the equivalent of eight DX7s or a fully populated TX816 tone module rack.
I’ve noticed that MiniDexed has a version running on a RPi Zero with a 3D-Printed case that looks really, really neat. But what I’d really like to do is reproduce the look and feel of an original TX816 rack. I know the UI was minimal, and I can’t imaging it being much fun to use, but the idea of that black panel with minimal red LEDs indicating it is busy has quite an appeal for me.
It would even be possible to use eight original Pi Zeros (or original “full” Pis) each with their own front panel, each “pretending” to be one of the original TF1 DX7 modules…
Kevin

It’s probably worth updating this post regarding the voices to include the `.syx` extension, and if you look at `getsysex.sh` in the root of the SD card there’s enough information in that script to figure out what’s going on for the filenames 😀
LikeLike
Good point! Now added 🙂
LikeLike
please help me to make raspberry pi 5 to boot same os from SD card
not supporting
LikeLike
Raspberry Pi 5 support was only added this week to MiniDexed, so unless you downloaded the firmware in the last couple of days, it won’t work.
The best place to discuss and follow RPi 5 support, which is still quite experimental, is the discussion area of the MiniDexed GitHub: https://github.com/probonopd/MiniDexed/discussions/635
Kevin
LikeLike