I picked up a cheap touchscreen display online, but it wasn’t easy to work out how to get it all working. Full details can be found here, so having got to this point I thought I’d start to explore its use as a MIDI controller.
Here are some follow-up projects based on this touchscreen:
- Arduino Touchscreen MIDI Controller – Part 2 – shows how to create 12 virtual “slider pots”.
- Arduino Touchscreen PWM Sound Output – “draws” a waveform and outputs it using PWM, controlled via MIDI.
- Arduino Touchscreen Auduino – is a touchscreen version of the Auduino granular synth.
- Arduino Touchscreen Mini MIDI Tenori-On – is a 16×8 touchscreen mini “Tenori-On” style MIDI controller.
Warning! I strongly recommend using old or second hand equipment for your experiments. I am not responsible for any damage to expensive instruments!
These are the key Arduino tutorials for the main concepts used in this project:
If you are new to Arduino, see the Getting Started pages.
Parts list
- Arduino Uno
- ILI9488 320×480 display with XPT2046 touchscreen
- DIY adaptor shield (as described here)
- MIDI out interface (e.g. Ready-Made MIDI Modules)
The Circuit
There is no circuit as such, the screen has to plug into the adaptor shield and MIDI has to be linked up to RX, TX, 5V and GND. In my case I used as cheap Arduino Uno copy that has extra pinouts for the UART, which makes connecting a MIDI module beneath the shield really easy.

The Code
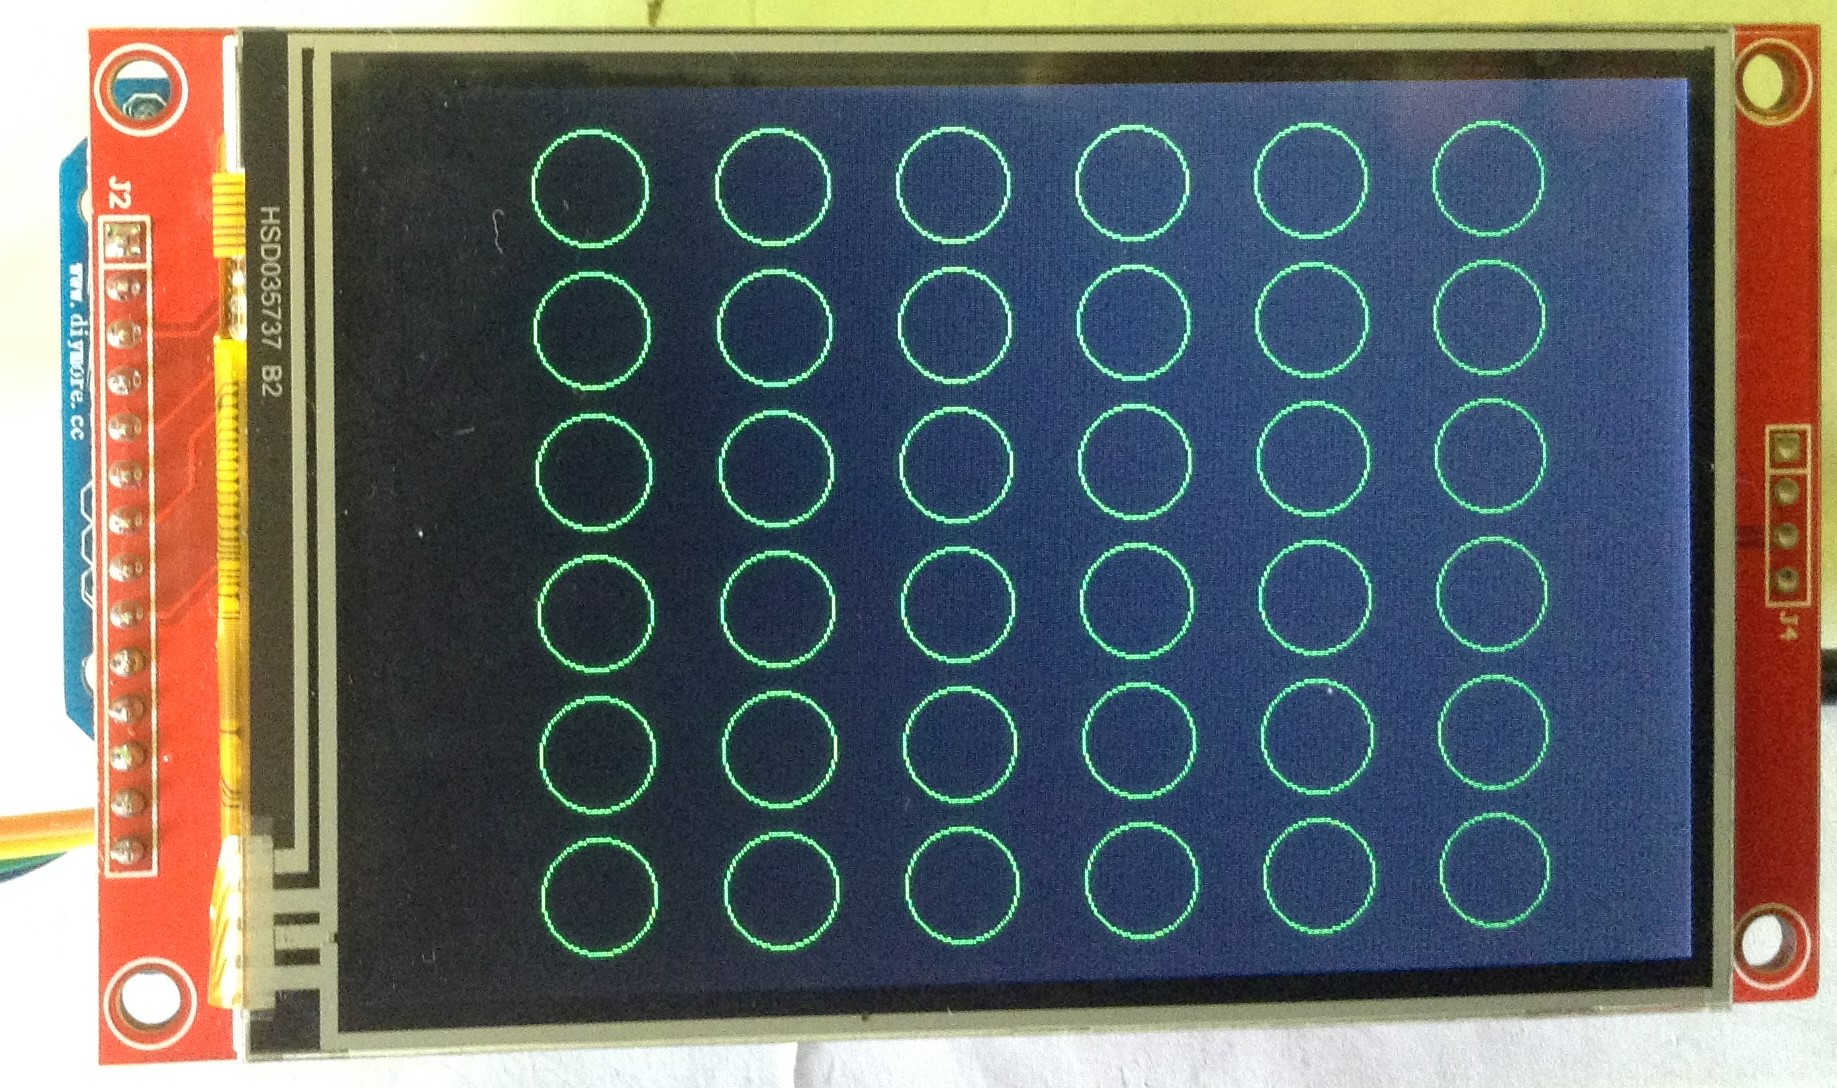
I decided to model a keypad matrix on the touchscreen, with each touch triggering the momentary action of playing a note over MIDI. I’ve gone for a 6×6 matrix of “keys” which can then be mapped onto a full pentatonic scale – I’m repeating the tonic at the top and bottom of each row.
The core MIDI code is the same as used many times before on this blog now. There is an array of notes to be played corresponding to each (virtual) key to be pressed and two lists to manage the buttons – one for the latest button press and one for the “last” press so that I can spot the off->on and on->off transitions and handle them accordingly.
Where things get interesting is the touch screen. The basics are all covered in the above mentioned blog post. I decided to get my code thinking in terms of “button numbers” (0 to 35) and wrote a set of routines that will go from (x,y) coordinates to a button number; and from a button number to an (x,y) coordinate.
This way, most of the code just thinks about buttons and how they map onto notes, but the mechanics of getting buttons displayed on screen or having their touch detected can be kept “out of the way”.
These are the main functions:
- Set up the graphics library and touchscreen: gfxSetup()
- Scan the touchscreen and update the display: gfxLoop()
- Turning buttons “on” and “off” (graphically): gfxBtnOn(), gfxBtnOff()
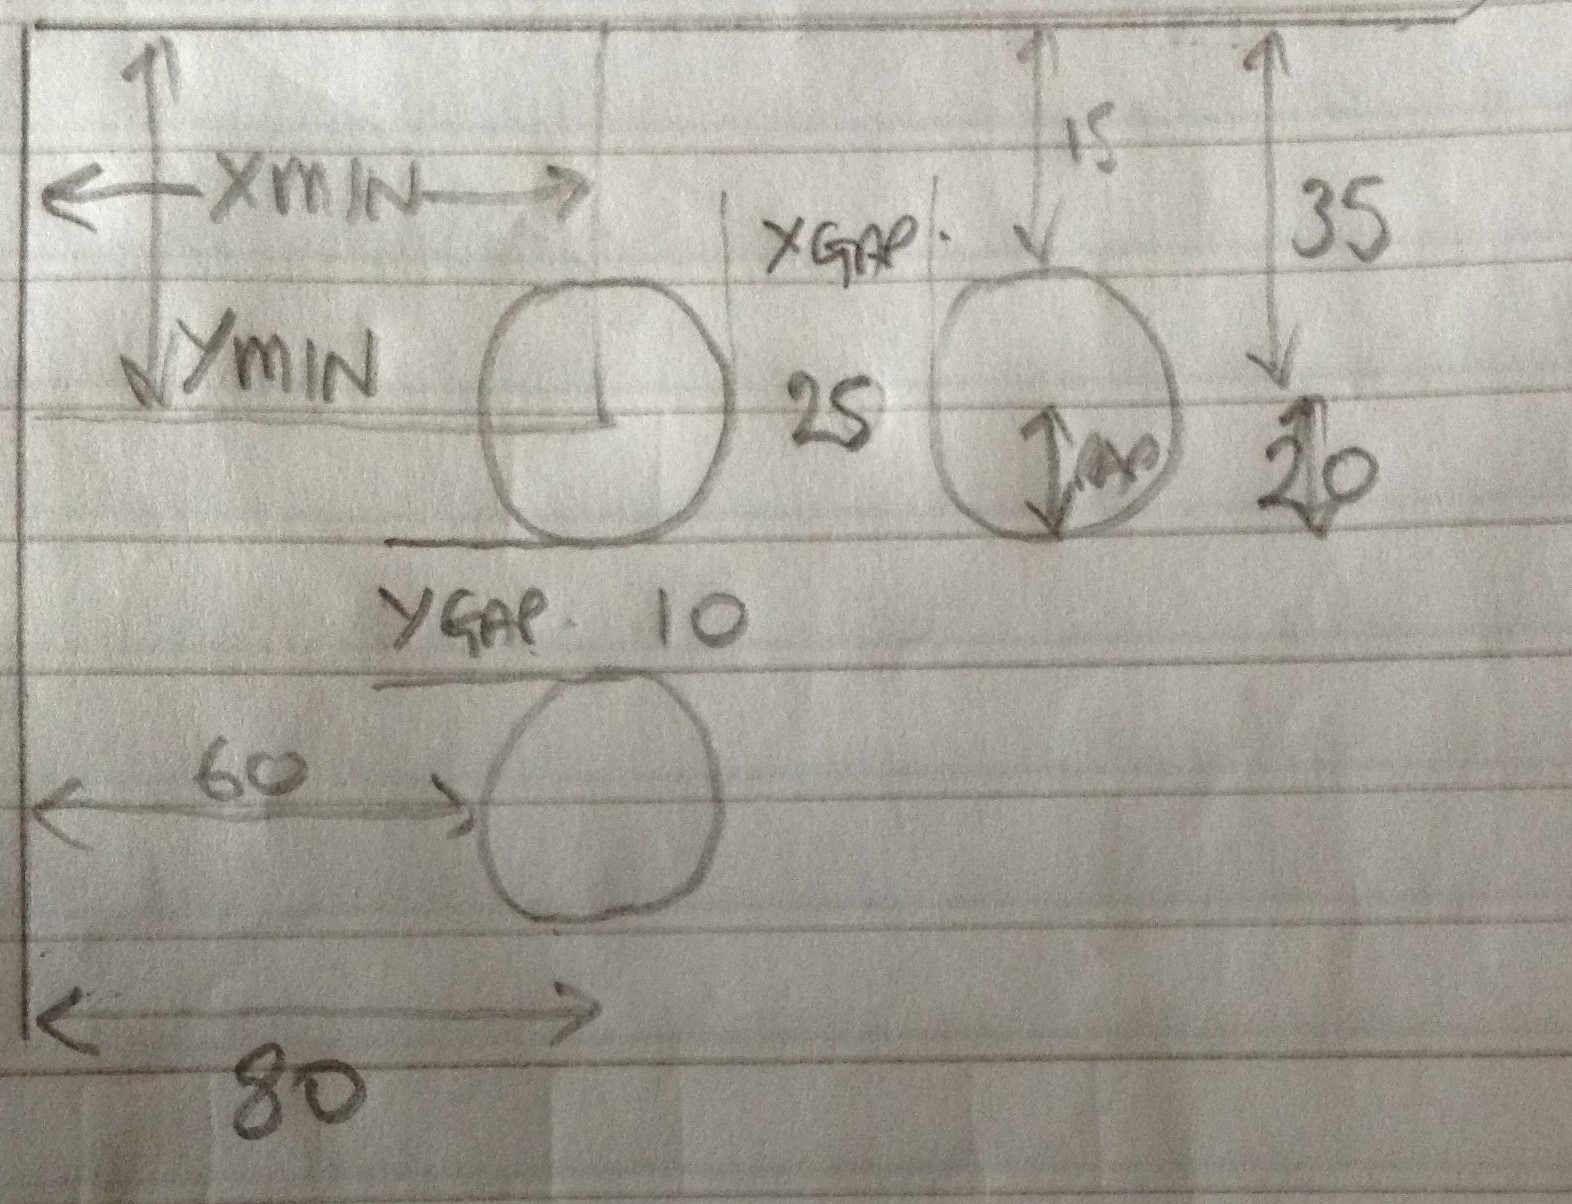
- Translating from button numbers (0 to 35) to display coordinates: btn2xc(), btn2yc()
- Finding the nearest button to a set of display coordinates (x,y): xy2btn() – note this returns -1 if the touch is not within the bounding square of a button
- Translating the touchscreen from its own coordinate system to the display coordinate system (these are taken from the linked blog post): xt2xdsp(), yt2ydsp()
There is quite a bit of TEST mode code in there too to dump out the button coordinates and the various ranges used in the functions. I’m not going to spend time here talking through each of the bits of code – there is quite a lot of translating between coordinate systems going on to make it all work!
It is entirely possible my maths is still off in places, but it works for me. If you want to get into the details, or start customising it further, I suggest running it in TEST mode, hook up a serial port, sketch out the coordinates of the buttons on some graph paper and see how the code is working as you touch the buttons.
Closing Thoughts
In the video you can see it playing one of the Harp sounds of my MT-32.
This isn’t a very easy project to duplicate in this form I’m afraid. There are many other options for touch screen displays for Arduinos and other microcontrollers, so with a bit of care I’m sure the basics could be moved across to another board.
But having spent quite a bit more time than is probably useful getting my cheap ILI9488 to work with an Arduino Uno, I was determined to do something musical with it.
I have an actual display shield to look at too, at some point, so I might see what will be required to get that working, as that doesn’t (hopefully) involve additional hardware.
I also have a few more ideas for touch interfaces – I’d like to create some virtual “slider pots”, possibly try drawing a waveform, and might even have a go at another Tenori-on.
I’m also wondering if this board could give me a screen on my Zynthian. Watch this space.
Although I have to say, having watched the video back, I am now seriously interested in writing a game of “snake” that acts as a MIDI controller too…
Kevin

