This are a mixture of beginner and advanced, DIY and off-the-shelf, options covering MIDI in (receive), MIDI out (send), and USBMIDI to MIDI conversion. All link into the RX and TX pins of your Arduino or other microcontroller. All are designed for 5V logic signals.
Here are some other pages of interest:
- Ready-Made MIDI Modules – a range of modules for “ready to go” MIDI IN and OUT for both 5V and 3V microcontrollers.
- DIY MIDI Interfaces – a range of DIY MIDI interfaces for non-Arduino like controllers, including 3V microcontrollers, single board computers, and PCs.
- Arduino and USB MIDI – a complete summary of USB MIDI interface related projects.
- MIDI Connections Cheat Sheet – how to work out which pins to use for your MIDI connectors.
Note that for many of these options, they must be disabled or not connected when you are uploading sketches to your Arduino, as the USB link on an Arduino Uno or Nano also needs to use the RX and TX pins.
And remember the golden rule and warning: I strongly recommend using an old or second hand keyboard for your MIDI experiments. I am not responsible for any damage to expensive instruments!
Kevin
Arduino Serial MIDI
Basic DIY MIDI Out Interface (Beginner)

Parts list:
- 2x 220Ω resistors
- 5-pin DIN plug or socket
For details, see: Arduino Simple MIDI Controller.
Basic DIY MIDI In Interface (Beginner)


Parts list:
- 6N138 optoisolator
- 1N914 diode
- 2x 220Ω resistor
- 4.7k resistor
- 5 pin din socket
- Breadboard or stripboard and jumper cables
For details, see: Simple MIDI Monitor – part 2.
MIDI Shield (Beginner)

Parts list:
- MIDI Shield
For details, see: Simple MIDI Monitor.
Universal Microcontroller MIDI Module (Intermediate)

Parts list:
- H11L1 optoisolator
- 2x 150Ω resistor (optional)
- 3x 220Ω resistor
- 1x 270Ω resistor (optional)
- 1x 1kΩ resistor
- 1x 1N914 diode
- 2x 5-pin 180 DIN sockets
- 1x 3.5mm stereo jack socket (optional)
- 1x 68nF capacitor (optional)
- 1x 100nF capacitor
- 1x 10uF non-polar capacitor (optional)
- 11 rows x 12 holes stripboard (7 rows if not adding the filter)
- 24 rows x 10 holes stripboard
For details, see: Universal Microcontroller MIDI Module.
DIY MIDI (Half) Shield (Advanced)


Parts list:
- 2x 5 pin DIN sockets
- 4x 220Ω resistors
- 1x 4K7 resistor
- 1x 1N914 diode
- 6N138 optoisolator
- 1x “right angle” DPDT or DPST pcb mounted switch
- 2x 6-way “long pin” female headers
- 2x 6-way male headers
- 1x 3-way female header
- 5x single pin male headers
- 5x single pin female header/socket
- Proto-board – 20×6 holes
- Proto-board – 20×7 holes
For details, see: MIDI In-Out Half-Shield.
DIY Nano Shield (Advanced)
Parts list:
- 5 pin DIN sockets
- 2x 220Ω resistors
- 1x 4K7 resistor
- 1x 1N914 diode
- 6N138 optoisolator
- 1x “right angle” DPDT or DPST pcb mounted switch
- 2x 10-way pin headers
- Proto-board – 10×7 holes
For details, see: Arduino Nano MIDI IN “Shield”.
Arduino MIDI Proto Shield (Advanced)

Parts List
- 5 pin DIN sockets
- 4x 220Ω resistors
- 1x 4K7 resistor
- 1x 1N914 diode
- 6N138 optoisolator
- Pin headers
- 8-way DIP socket
- 2x 5-pin 180 DIN sockets
- Arduino MIDI Proto Shield PCB
For details see: Arduino MIDI Proto Shield – Part 2.
Arduino Stackable TRS MIDI Shield

Parts List
- 2x stereo TRS sockets
- 4x 220Ω resistors
- 1x 4K7 resistor
- 1x 1N914 diode
- 6N138 optoisolator
- Pin headers
- 8-way DIP socket
- Arduino MIDI Proto Shield PCB
For details see: Arduino Stackable TRS MIDI Interface.
Arduino USB MIDI Hosts
USBMIDI to MIDI Converter (Beginner)

Parts list:
- MIDI Shield
- USB Host Module
For details, see: Simple USB-MIDI to MIDI.
USBMIDI Shield (Intermediate)

Parts list:
- Arduino Pro Mini – Must be the 3.3V (8MHz) version
- FDTI or similar “programmer” board for the Arduino Pro Mini (must be compatible with the 3.3V version)
- Mini USB Host Shield
- SPST PCB-mounting switch
- Male headers
- Arduino stacking headers
- Arduino Proto Shield
- Jumper wires
For details see: USBMIDI to MIDI Shield.
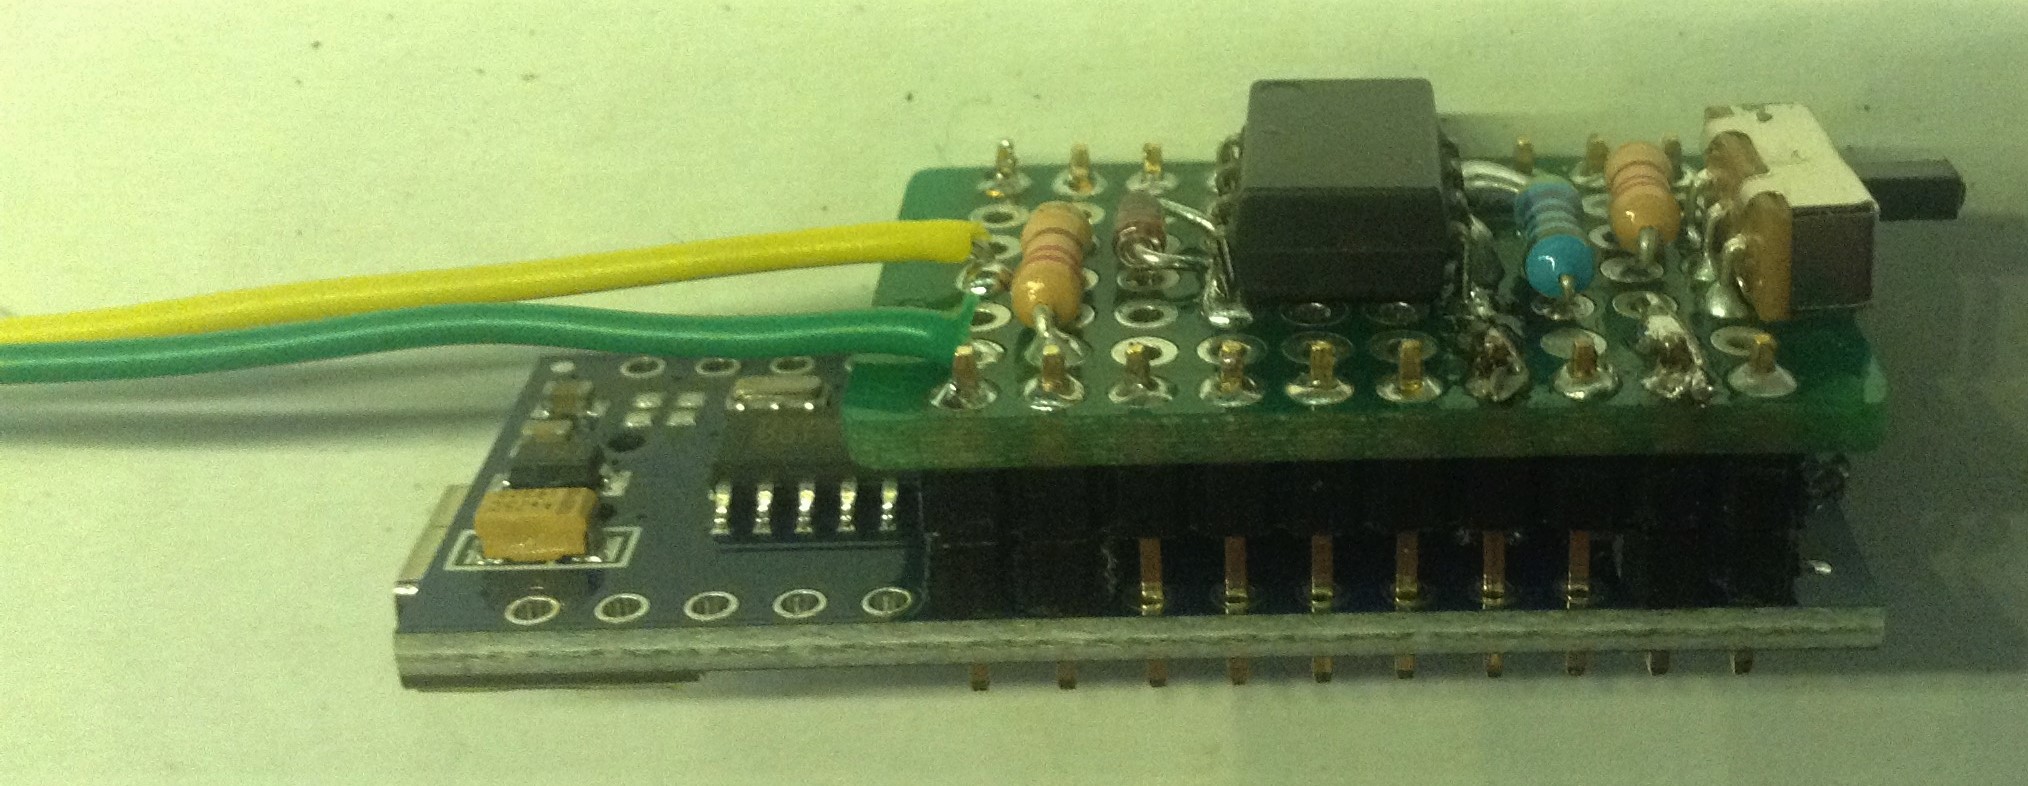
Mini USBMIDI to MIDI Converter (Advanced)

Parts list:
- Arduino Pro Mini – Must be the 3.3V (8MHz) version
- FDTI or similar “programmer” board for the Arduino Pro Mini (must be compatible with the 3.3V version)
- Mini USB Host Shield
- 1x 10Ω resistor
- 1x 33Ω resistor
- 1x 5 pin DIN socket
- micro USB socket breakout board
- Long and short header pins
- Stripboard and jumper wires
For details, see: Mini USB-MIDI to MIDI.
USBMIDI to MIDI Revisited (Beginner)
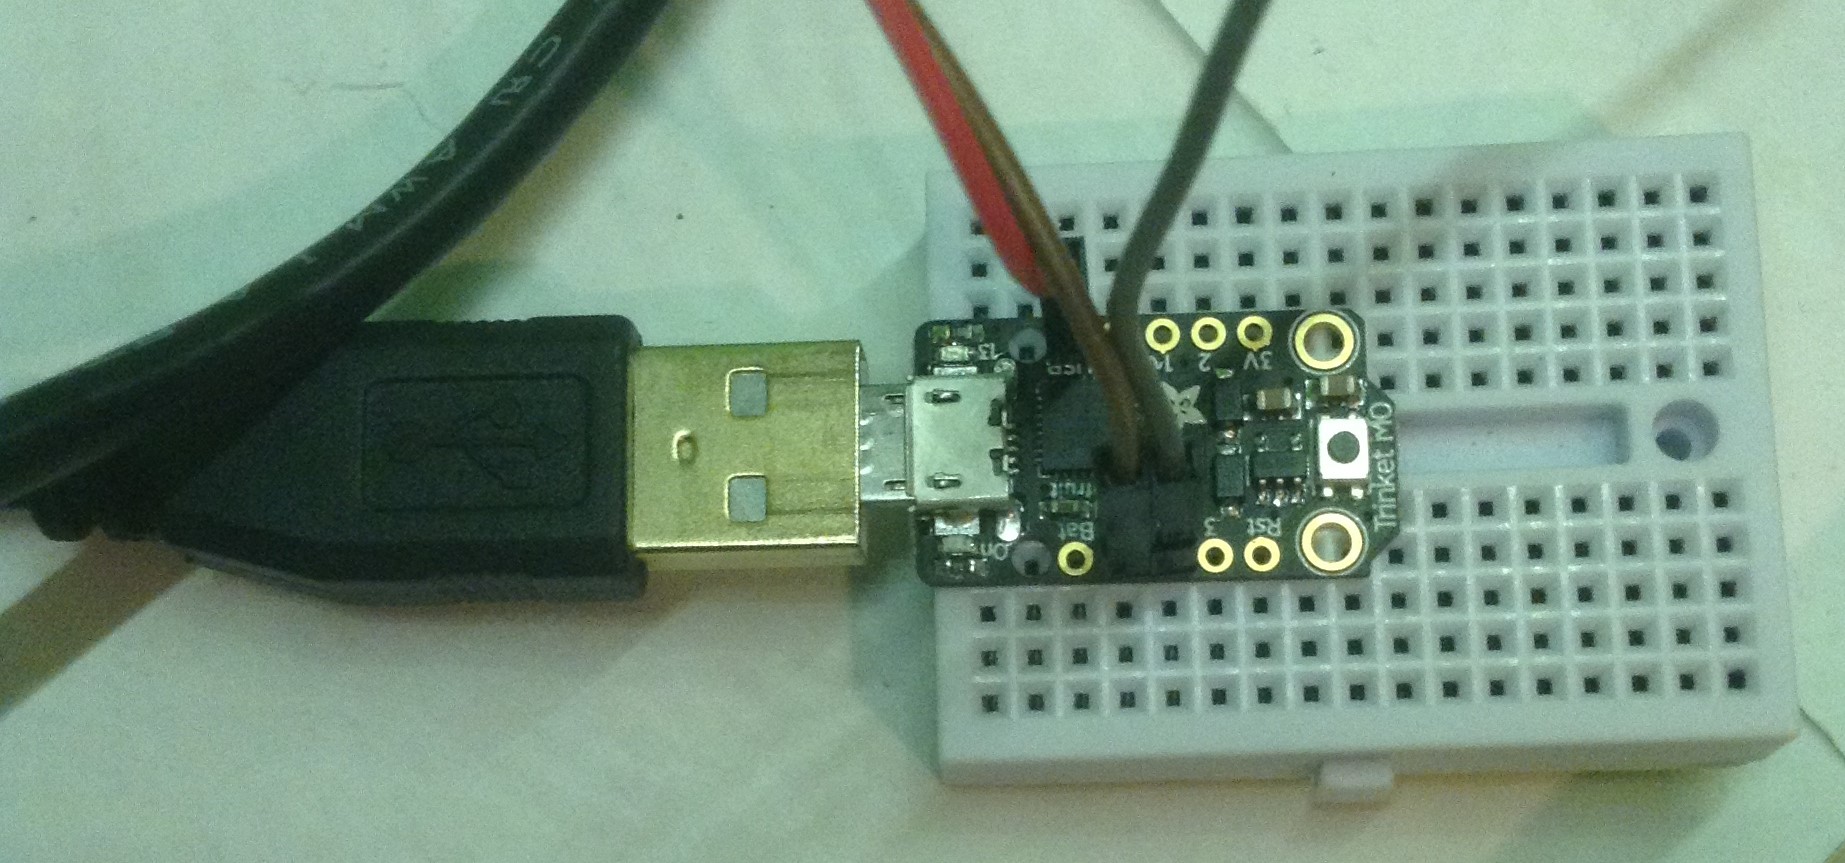
Parts List:
- Adafruit Trinket M0
- Micro-USB OTG Adaptor
For details, see USB-MIDI to MIDI Revisited.
Arduino USB MIDI Devices
PC USB MIDI to Arduino Serial Port MIDI (Intermediate)

Parts list:
- Arduino “Leonardo” or compatible (“USB Beetle” shown above).
For details, see: PC USB to Arduino Serial MIDI.
PC USB MIDI to Arduino Serial Port MIDI Shield (Intermediate)

Parts List:
- Arduino Pro Micro (3.3V 8MHz)
- Arduino Uno proto shield
- Headers and jumper wires
For details, see: PC USB to Arduino Serial MIDI – Part 2.
PC USB-MIDI to MIDI Re-Revisited (Beginner)

Parts List:
- Pro Micro (ATmega32U4)
- One of the Ready-Made MIDI Modules or another MIDI interface from this page
For details, see PC USB-MIDI to MIDI Revisited.

How to make work on beaglebone and orange Pi serial uart MIDI not USB not Raspberry
LikeLike
Well I believe those are both 3V3 logic level devices, so hardware wise you need one of the posts about 3V3 level interfaces.
Software wise I don’t have either of those boards so can’t really help I’m afraid.
Kevin
LikeLike
I’m still confused about connecting the midi dream sam 2695 gm synth module pin there are 4 1. midi , 2 vin,, 3 ground , 4 , 33v how to use arduino uno to this module? does it use a pin 1 logic level module to low logic level and a 220 ohm resistor and high to arduino tx to pin 1 midi dream2695 pin 2 vin2 ? ,pin3,2695 to ground,pin4 33v to logic low level and 220 ohm resistor,logic high to arduino 5v but pin 2695 is pin 2 vin (power)to connect to arduino (power) arduino 5v or 33v? to make a serial midi connection
LikeLike
“Gallery | Dream SAM2695 breakout board | Hackaday.io” https://hackaday.io/project/6378/gallery#95cb5fe72b5e5c46e61d3a8c065a9a62
LikeLike